Webhooks
By using webhooks you can keep your other systems up to date with events in your dynamic tool. For example, when your customer places a quotation request, DynaMaker can notify your ERP system.
The DynaMaker Webhooks Plugin
The DynaMaker webhooks plugin makes it easy to integrate with events related to your project. To get started, open the configuration from the plugins section of your DynaMaker app dashboard. Enable it and fill in the URL on which you want to receive POST requests.
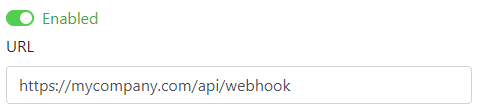
Always use secure endpoints (https) in production
Designing A Webhook Endpoint
The first step to adding a webhook to your integration is to build or activate your own custom endpoint. Perhaps your current solution has a webhook module that you can activate or if you use Node.js and a framework like express, you will probably add a new POST route with a URL of your choice.
Before looking at the code, there are several key considerations regardless of the technology involved. You should also review the best practices for using webhooks.
Key Considerations
For each event occurrence, DynaMaker POSTs the webhook data to your endpoint in JSON format. The full event details are included and can be used directly after parsing the JSON. Thus, at minimum, the webhook endpoint needs to expect data through a POST request and confirm successful receipt of that data.
Return A 2xx Status Code
To acknowledge receipt of an event, your endpoint must return a 2xx HTTP status code.If we do not receive a 2xx HTTP status code, the notification attempt is repeated. After multiple failures to send the notification over multiple days, we mark the event as failed and stop trying to send it to your endpoint. Your endpoint should return a 2xx HTTP status code as soon as possible, prior to any complex logic that could cause a timeout.
Example Code
Here is an example program written in TypeScript to showcase the use of DynaMaker webhooks. It uses the official dynamaker package to parse the webhook POST request and the got package to interact with the quotations REST API, both available on npm.
import express from 'express'
import got from 'got'
import { webhookParser } from 'dynamaker'

const port = process.env.PORT || '8080'
const quotationSecret = process.env.DYNAMAKER_QUOTATION_SECRET
const webhookSecret = process.env.DYNAMAKER_WEBHOOK_SECRET
const app = express()

app.post('/webhook', webhookParser(webhookSecret), (req, res) => {
  const { files, projectUrl, type, createdAt } = req.dynamakerWebhook.payload

  console.log(`[EVENT] '${type}' occurred at ${createdAt}`)

  files.forEach(async (file) => {
    try {
      const response = await got(`${projectUrl}/quotation/files/${file.id}`, {
        method: 'GET',
        headers: { Authorization: `Bearer ${quotationSecret}` },
      })

      console.log(`${file.name}: ${response.body}`)
    } catch (error) {
      console.error(error)
    }
  })

  return res.sendStatus(200)
})

app.listen(port, () => console.log(`Example app listening on port ${port}`))
Events
A webhook is always triggered by an associated event. For example, when a customer creates a new quotation request, the
quotation.created event is sent to your webhook endpoint.
Verifying the signature
The DynaMaker-Signature header included in each signed event contains a timestamp and a signature. The timestamp is
prefixed by t=, and each signature is prefixed by a scheme. Schemes start with v, followed by an integer.
Currently, the only valid live signature scheme is v1.
DynaMaker-Signature:
t=1592774577,
v1=7e77a0e56ff536d0ce8e108d8bd5257a869e7ecebeda32affa62cdca3fa51cad
Newlines have been added for clarity, but a real DynaMaker-Signature header is on a single line.
DynaMaker generates signatures using a hash-based message authentication code
(HMAC) with SHA-256. To prevent downgrade
attacks, you should ignore all schemes that are not v1.
Step 1: Extract the timestamp and signature from the header
Split the header, using the , character as the separator, to get a list of elements. Then split each element, using
the = character as the separator, to get a prefix and value pair.
The value for the prefix t corresponds to the timestamp, and v1 corresponds to the signature. You can discard all
other elements.
Step 2: Prepare the signed_payload string
The signed_payload string is created by concatenating:
- The timestamp (as a string)
- The character
. - The actual JSON payload (the request body)
Step 3: Determine the expected signature
Compute an HMAC with the SHA256 hash function. Use the secret found in the webhooks plugin as the key, and use the
signed_payload string as the message.
Step 4: Compare the signatures
Compare the signature in the header to the expected signature. For an equality match, compute the difference between the current timestamp and the received timestamp, then decide if the difference is within your tolerance.
To protect against timing attacks, use a constant-time string comparison to compare the expected signature to the received signature.
Credit
This page is heavily inspired by the excellent documentation on webhooks by Stripe.