Auth0
Auth0 is a flexible, drop-in solution to add authentication and authorization services to your applications. You can connect any application to Auth0 and define the identity providers you want to use (how you want your users to log in), so each time a user tries to authenticate, Auth0 will verify their identity and send the required information back to your app. You can read more about it in its own documentation here.
In DynaMaker, Auth0 exists as a plugin and it is very easy to use! In order to explain how it works, we will go through:
1. Auth0 Account
A. Register / Login
You need an account in Auth0 to be able to use it in DynaMaker. You can use the same account for multiple applications and have custom settings for each one. If you don't have an account yet, you can create one for free at https://auth0.com/signup.
B. Create Application
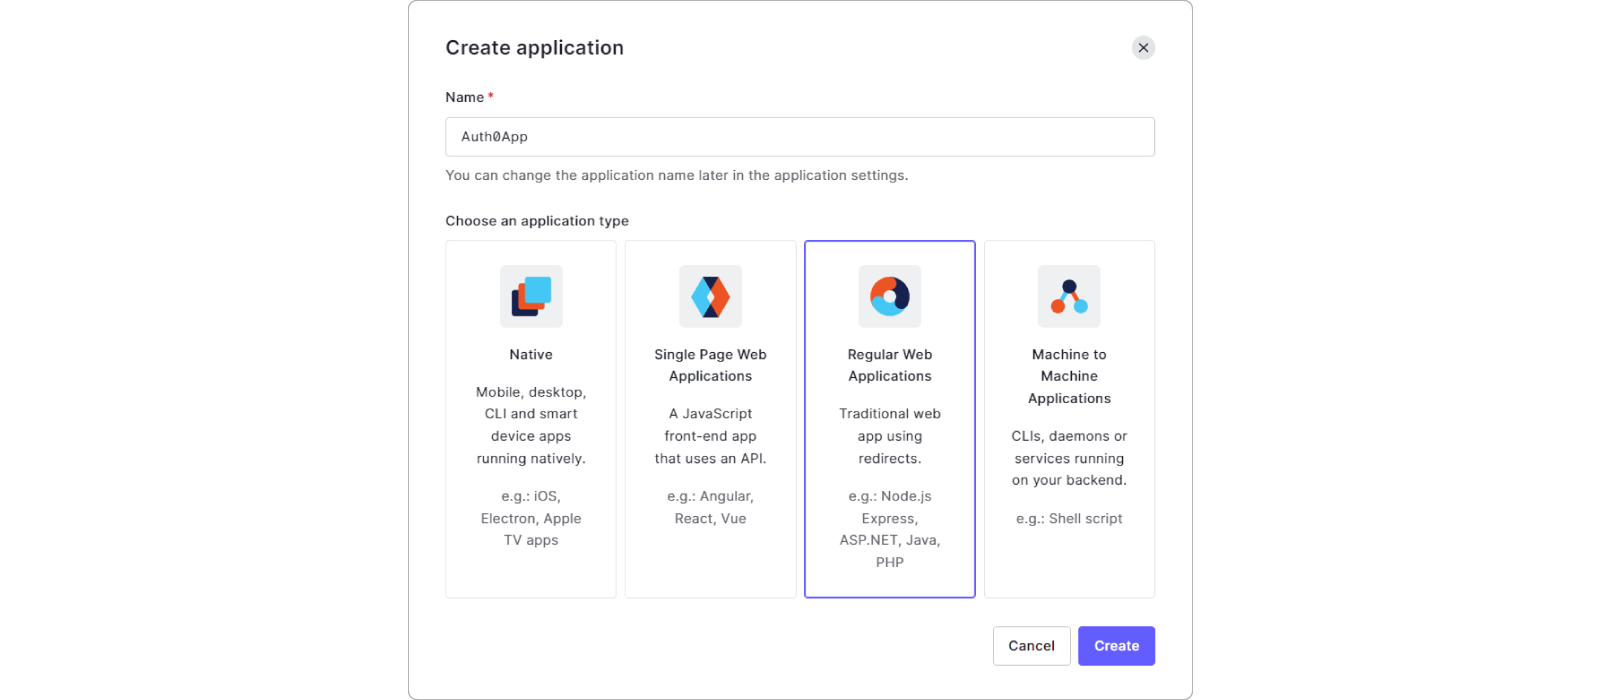
In the dashboard of Auth0, go to Applications and Create application.

Give it a name (it doesn't need to be the same as the DynaMaker app) and choose the type Regular Web Applications and Create. You can also remove the Default App since we will create a new one from the beginning.
Once we have set up the application, let's go back to DynaMaker!
2. DynaMaker Plugin
To be able to use the plugin, you need to configure the settings in both DynaMaker and Auth0 applications.
A. DynaMaker Settings
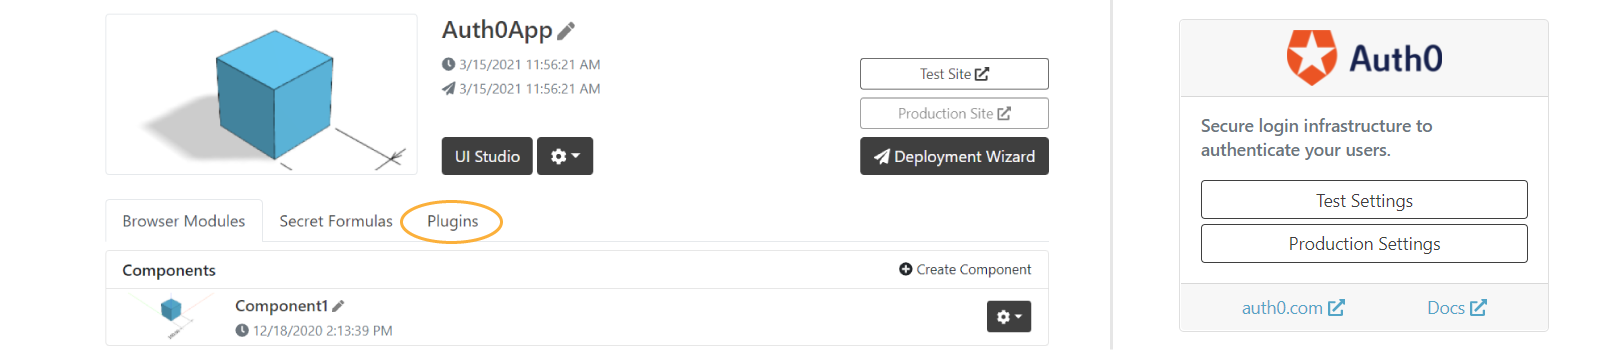
You can find the Auth0 plugins under Plugins in your app dashboard.
See that you have different settings for the Test and Production sites. Here we show how to enable it for Test first and later how to enable it for Production, both using the same application created in Auth0. But of course you can have one Auth0 application for Test and another one with different settings for Production.
Go into Test Settings and notice that it requires Domain, Client ID and Client Secret. Take these values from the settings of your Auth0 application. Don't forget to set the toggle to Enabled.

B. Auth0 Settings
Finally you need to update the Auth0 settings to connect it with the DynaMaker app. Go to your Auth0 app, under Settings, scroll down to the Application URIs section and fill in the following fields accordingly for Test Site:
Allowed Callback URLs
https://deployed.dynamaker.com/applications/test/YOUR_PROJECT_ID/callback
Allowed Logout URLs
https://deployed.dynamaker.com/applications/test/YOUR_PROJECT_ID/
Allowed Web Origins
https://deployed.dynamaker.com
YOUR_PROJECT_ID is the ID of the project in DynaMaker. You can find it in the browser URL field when you have the
app dashboard or the UI Editor open:

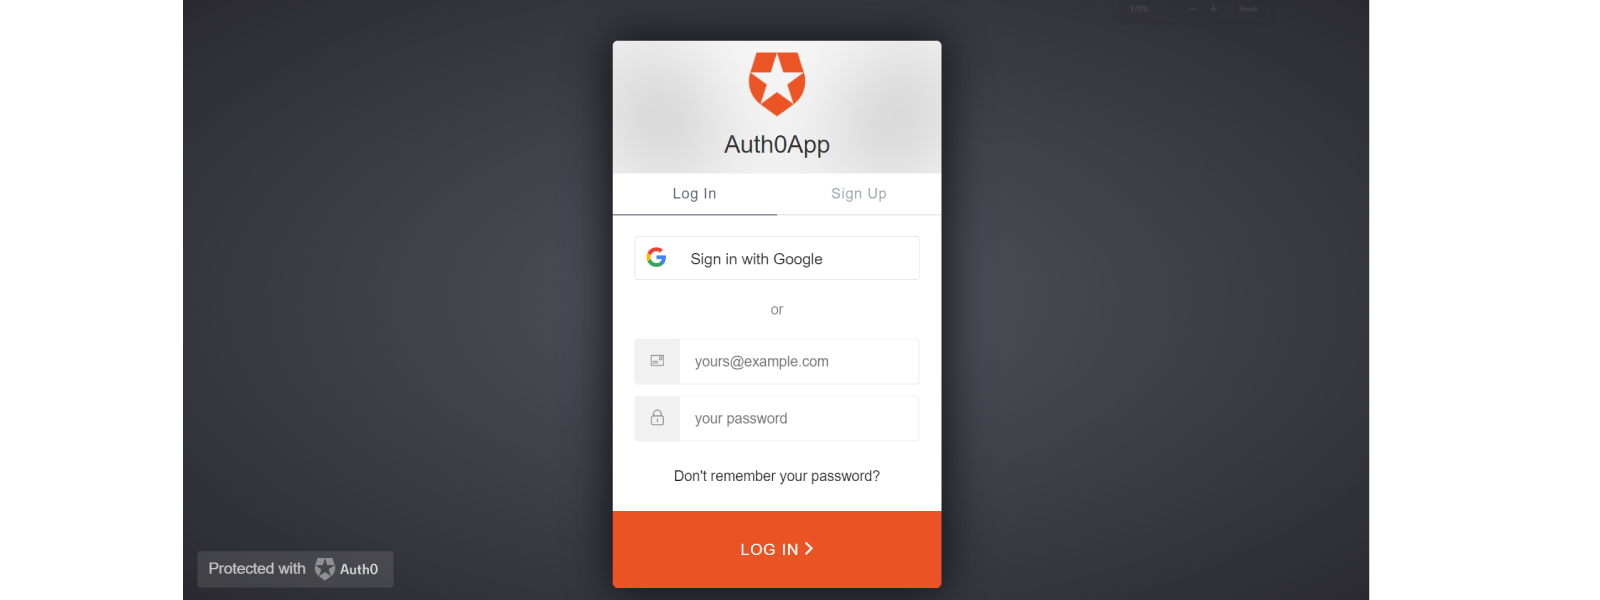
Back in the dashboard of your DynaMaker app, if you try to go to Test Site you should now be prompted to log in.
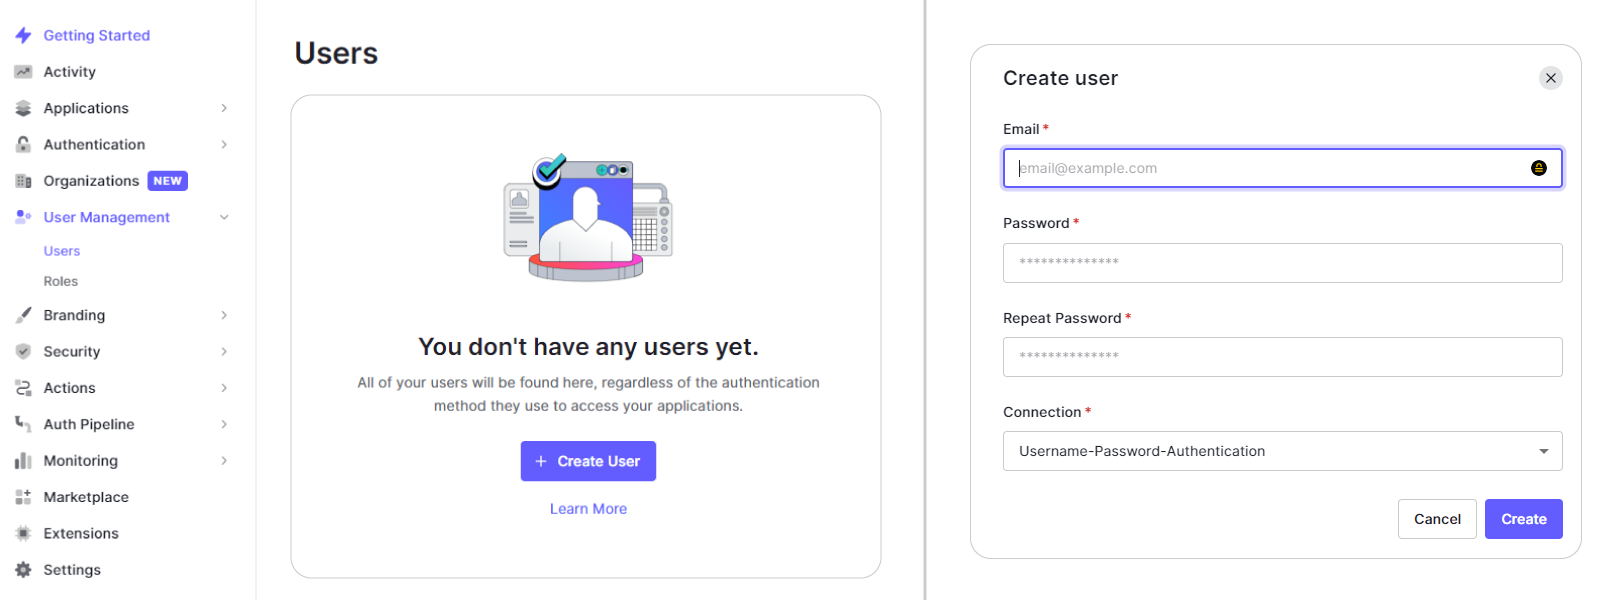
C. Create pre-defined users
Let's say that you want to limit the access and you want to give access to a specific user. You can send e-mail invitations for the application sign up with custom features, but as a quick start to show you how it works let's create a user we know with a predefined password.
Create user
In your Auth0 app, under User Management/Users, create a user with the email and any password. The user will be able to reset the password with Forgot password? in the Auth0 pop up when visiting the DynaMaker app.
In Auth0 you can now manage that user and see their login history among other useful things. In this case we only want pre-created users to have access, so let's disable sign-ups and log in with Google accounts.
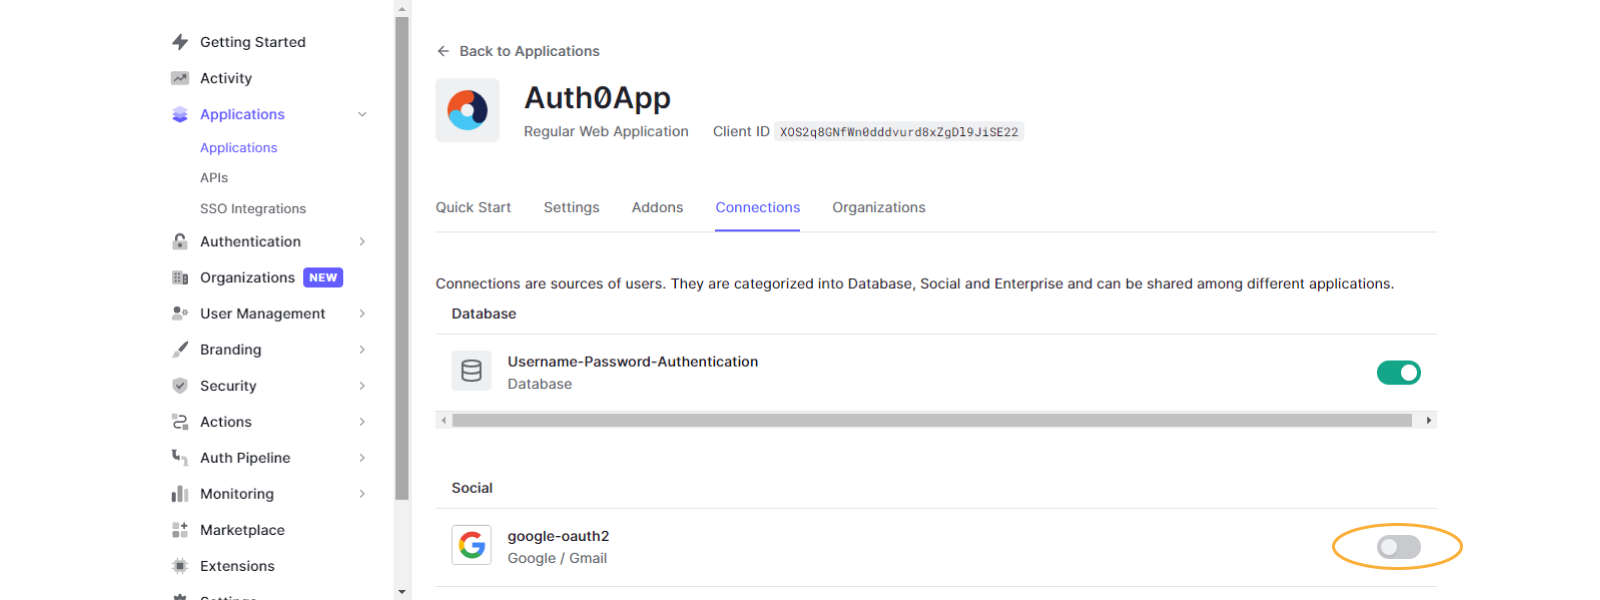
Disable sign ups
In your Auth0 app, under Connections/Social, disabled Google sign ups. Doing this, you could avoid new user sign ups to your app through Google accounts.
Add logout
Let's add a logout button in the built-in dropdown Menu.
- Go to your DynaMaker application (UI Studio).
- Go to UI.
- In the
onInit()function, update the menu items to include the logout button:
Studio.setMainMenuItems([
  new SKYUI.Button('Save', () => {
    LoadSaveProject.openPopupSave()
  }),
  new SKYUI.Button('Load', () => {
    LoadSaveProject.openPopupLoad()
  }),
  new SKYUI.Button('Logout', () => {
    location.href = location.origin + location.pathname + 'logout'
  }),
])
Now you should be able to log in and out with your predefined user in your deployed application.
D. Customize Universal Login
In Auth0 it is possible to change the appearance of the log-in pop up. You can do that in Universal Login/Settings. In this case, we have changed the logo and the colors to match DynaMaker's, but there are a lot more features to customize.

You can read more about universal login in the official Auth0 docs.