User Authentication & Authorization
User authentication is commonly handled by the customer portal via username and password. Authorization is the process of giving the user permission to access a specific resource or function. In DynaMaker the following standard plugins can be found:
Auth0
Give users permission-based access control to limit access within your product configurators.

JWT
Secure your product configurators by validating user identity with JSON Web Tokens.
Auth0
Auth0 is a flexible, drop-in solution to add authentication and authorization services to your applications. You can connect any application to Auth0 and define the identity providers you want to use (how you want your users to log in), so each time a user tries to authenticate, Auth0 will verify their identity and send the required information back to your app. You can read more about it in its own documentation here.
Auth0 is recommended for standalone DynaMaker product configurators.
In DynaMaker, Auth0 exists as a plugin and it is very easy to use! In order to explain how it works, we will go through:
1. Auth0 Account
1A. Register / Login
You need an account in Auth0 to be able to use it in DynaMaker. You can use the same account for multiple applications and have custom settings for each one. If you don't have an account yet, you can create one for free at https://auth0.com/signup.
1B. Create Application
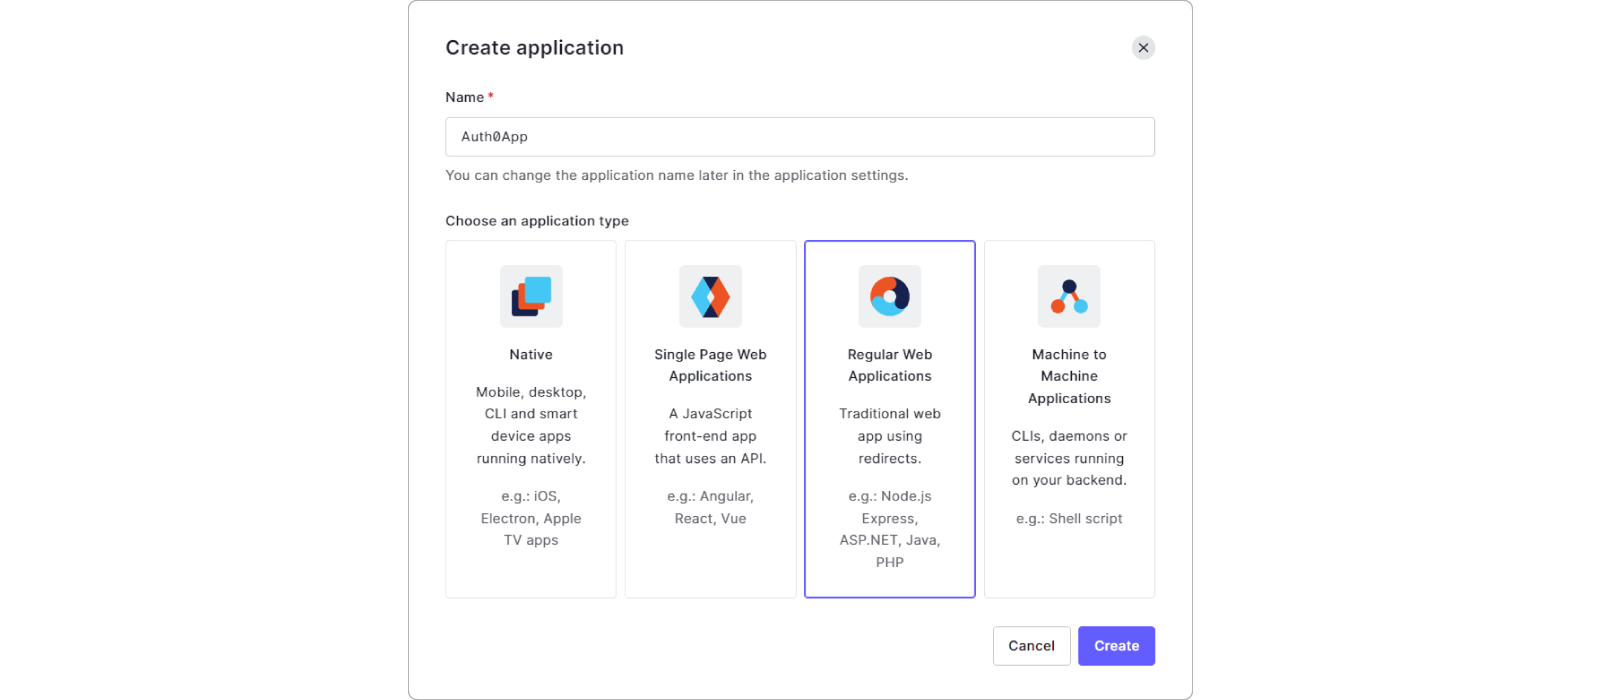
In the dashboard of Auth0, go to Applications and Create application.

Give it a name (it doesn't need to be the same as the DynaMaker product configurator) and choose the type Regular Web Applications and Create. You can also remove the Default App since we will create a new one from the beginning.
Once we have set up the application, let's go back to DynaMaker!
2. DynaMaker Plugin
To be able to use the plugin, you need to configure the settings in both the DynaMaker product configurator and the Auth0 application.
2A. DynaMaker Settings
You can find the Auth0 plugins under Plugins in your dashboard.
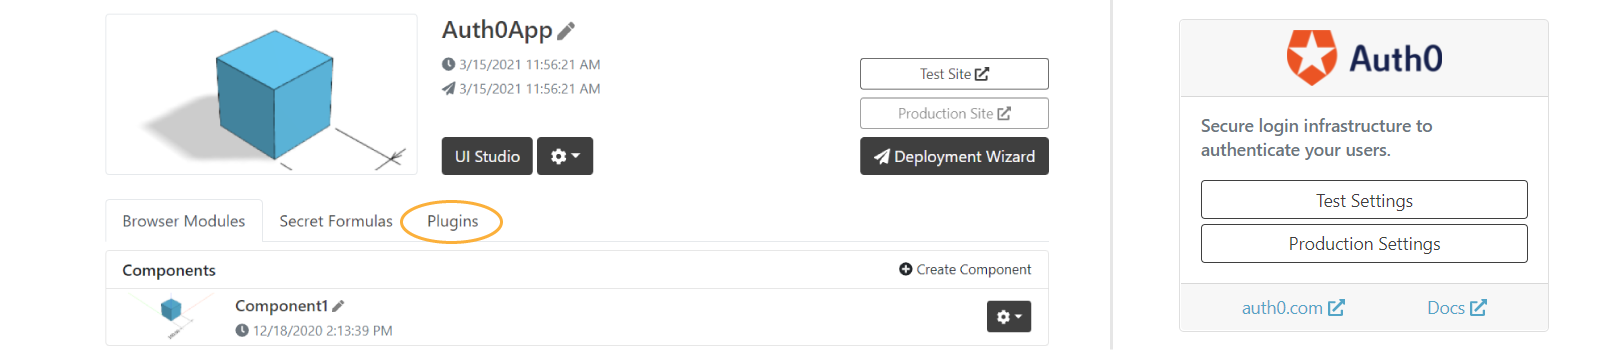
See that you have different settings for the Test and Production sites. Here we show how to enable it for Test first and later how to enable it for Production, both using the same application created in Auth0. But of course you can have one Auth0 application for Test and another one with different settings for Production.
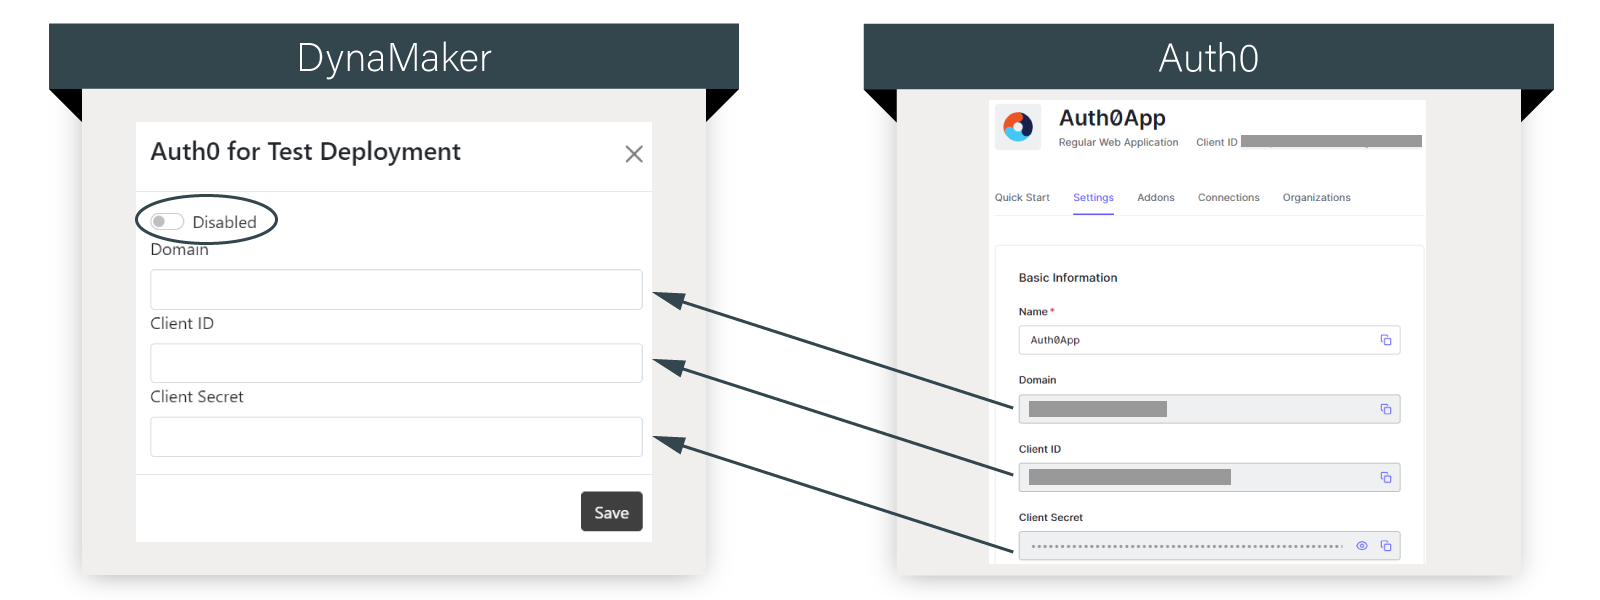
Go into Test Settings and notice that it requires Domain, Client ID and Client Secret. Take these values from the settings of your Auth0 application. Don't forget to set the toggle to Enabled.
2B. Auth0 Settings
Finally you need to update the Auth0 settings to connect it with the DynaMaker product configurator. Go to your Auth0 app, under Settings, scroll down to the Application URIs section and fill in the following fields accordingly for
Test Site:
Allowed Callback URLs
https://deployed.dynamaker.com/applications/test/YOUR_PROJECT_ID/callback
Allowed Logout URLs
https://deployed.dynamaker.com/applications/test/YOUR_PROJECT_ID/
Allowed Web Origins
https://deployed.dynamaker.com
YOUR_PROJECT_ID is the ID of the project in DynaMaker. You can find it in the browser URL field when you have the
dashboard or the UI Editor open:

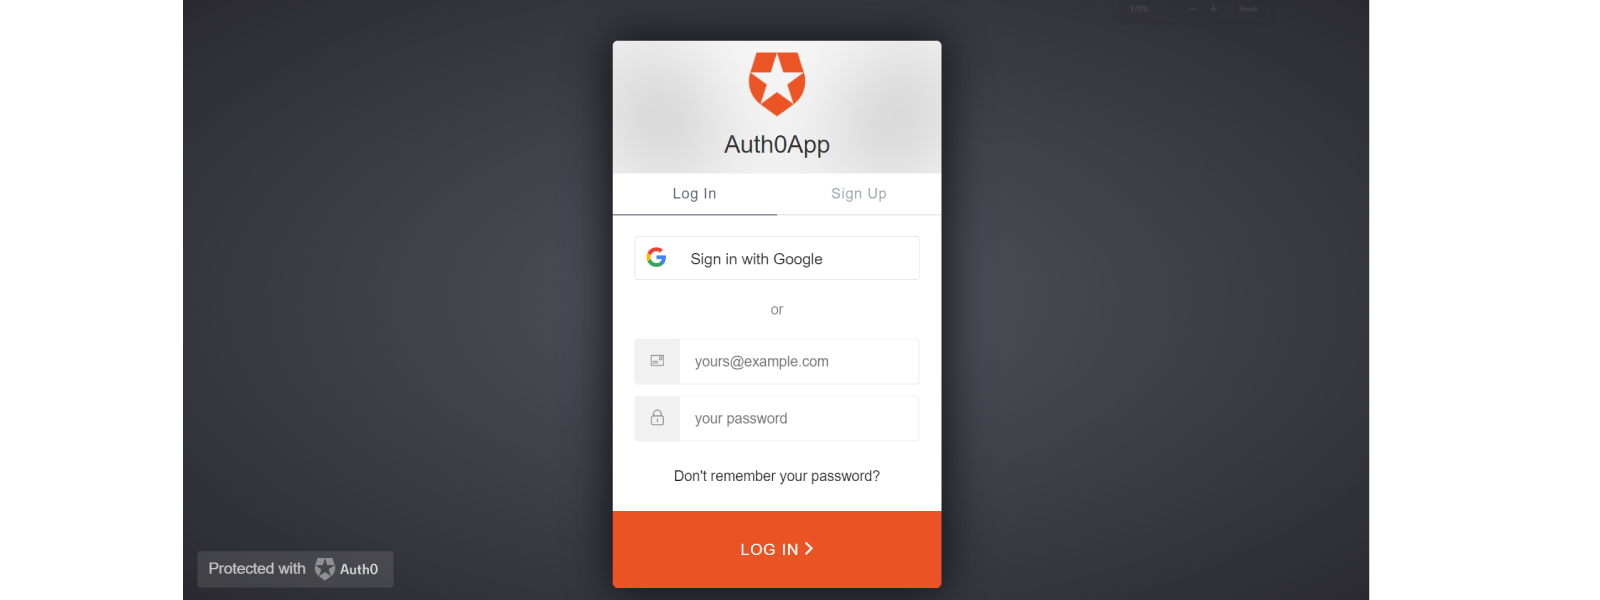
Back in the dashboard of your DynaMaker product configurator, if you try to go to Test Site you should now be prompted to log in.
2C. Create pre-defined users
Let's say that you want to limit the access and you want to give access to a specific user. You can send e-mail invitations for the application sign up with custom features, but as a quick start to show you how it works let's create a user we know with a predefined password.
2D. Create user
In your Auth0 app, under User Management/Users, create a user with the email and any password. The user will be able to reset the password with Forgot password? in the Auth0 pop up when visiting the DynaMaker product configurator.
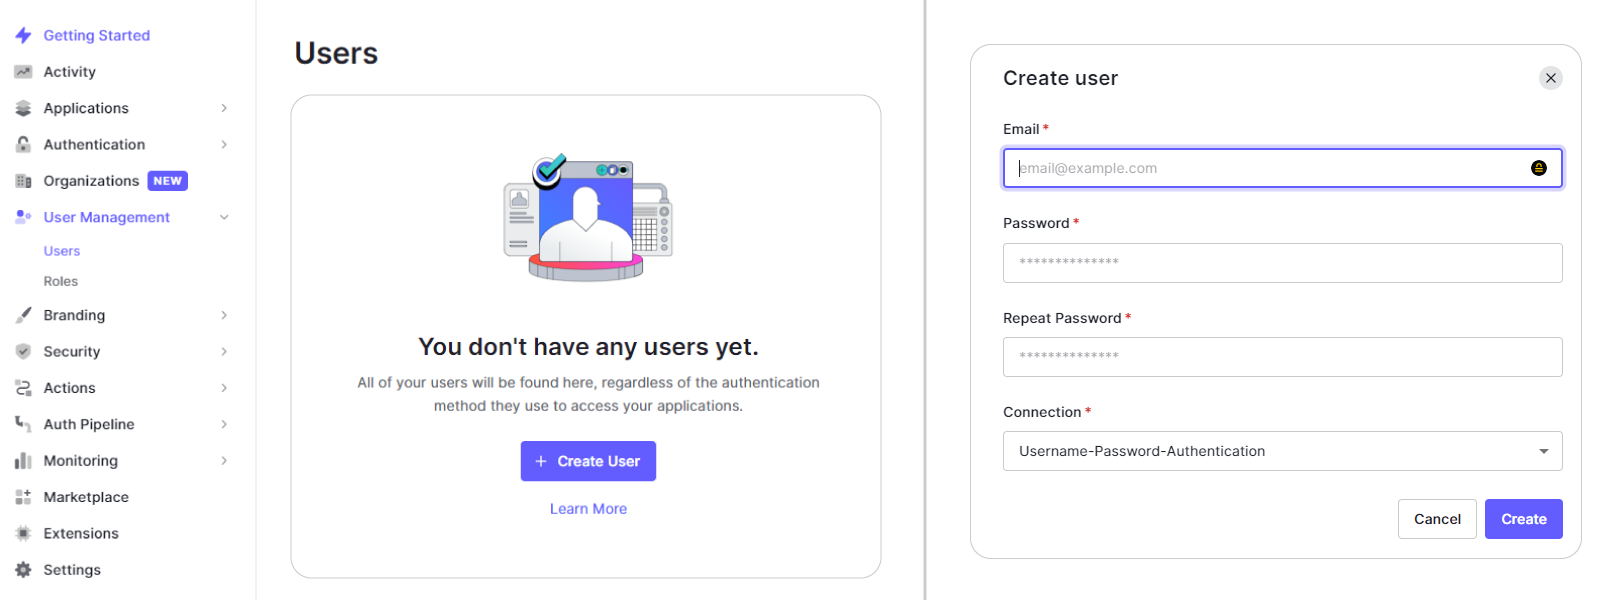
In Auth0 you can now manage that user and see their login history among other useful things. In this case we only want pre-created users to have access, so let's disable sign-ups and log in with Google accounts.
2E. Disable sign ups
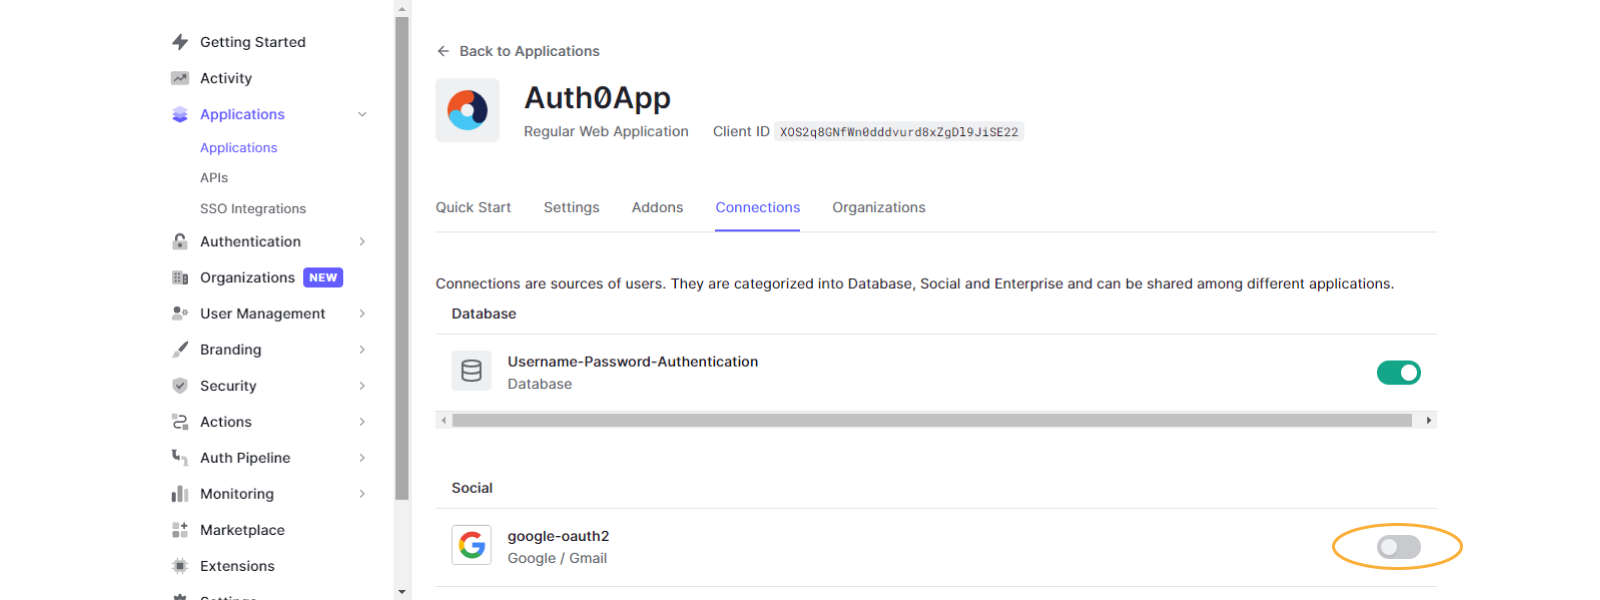
In your Auth0 app, under Connections/Social, disabled Google sign ups. Doing this, you could avoid new user sign ups to your product configurator through Google accounts.
2F. Add logout
Let's add a logout button in the built-in dropdown Menu.
- Go to your DynaMaker product configurator (UI Studio).
- Go to UI.
- In the
onInit()function, add a menu item to include the logout button:
Studio.setMainMenuItems([
  new SKYUI.Button('Logout', () => {
    location.href = location.origin + location.pathname + 'logout'
  }),
])
Now you should be able to log in and out with your predefined user in your published product configurator.
2G. Customize Universal Login
In Auth0 it is possible to change the appearance of the log-in pop up. You can do that in Universal Login/Settings. In this case, we have changed the logo and the colors to match DynaMaker's, but there are a lot more features to customize.

You can read more about universal login in the official Auth0 docs.
JWT
JSON Web Token or JWT is an open, industry-standard RFC 7519 method for representing claims securely between two parties and is the recommended way of adding authorization to your deployed DynaMaker product configurator. The jwt.io website is a great resource when working with JWTs.
JWT is recommended for DynaMaker product configurators integrated with an existing customer portal.
1. Creating a token
When the user has successfully logged in to your user portal, you can create a signed JWT for that user. We recommend using a well-maintained library to create the token.
Token claims
{
  // REQUIRED. Unique and persistent ID of the user.
  "sub": "77e62e94-b416-4497-816d-0f9fa740c51b",

  // REQUIRED. Identifies the time at which the JWT was issued. A JSON numeric
  // value representing the number of seconds from 1970-01-01T00:00:00Z UTC
  // until the specified UTC date/time, ignoring leap seconds.
  "iat": 1516239022,

  // REQUIRED. Identifies the expiration time on after which the JWT MUST NOT
  // be accepted for processing. A JSON numeric value representing the number
  // of seconds from 1970-01-01T00:00:00Z UTC until the specified UTC
  // date/time, ignoring leap seconds.
  "exp": 1516325422,

  // OPTIONAL. Read about the "role" claim in the following section.
  "role": "user",

  // OPTIONAL. If you want to add other fields to your JWT, we recommend
  // wrapping them in an object with the property name "custom", to avoid any
  // potential conflicts with DynaMaker fields.
  "custom": {
    "organizationId": "IPaCb28MH",
  }
}
User role
We use the role claim to assign a product configurator-level role to the user.
- The
userrole enables saving and loading of configurations within the deployed product configurator. - The
managerrole gives access to other users' saved configurations within the deployed product configurator.
Signing the token
The JWT must be signed with HS256 (HMAC with SHA-256). It is a symmetric algorithm, which means that there is only one private key that must be kept secret, and it is shared between the two parties. Since the same key is used both to generate the signature and to validate it, care must be taken to ensure that the key is not compromised. You can create a secret from the settings modal in your dashboard.
Example
// content
{
  "sub": "77e62e94-b416-4497-816d-0f9fa740c51b",
  "iat": 1516239022, // Thu Jan 18 2018 02:30:22 GMT+0100
  "exp": 1516325422  // Fri Jan 19 2018 02:30:22 GMT+0100
}

// signed
eyJhbGciOiJIUzI1NiIsInR5cCI6IkpXVCJ9.eyJzdWIiOiI3N2U2MmU5NC1iNDE2LTQ0OTctODE2ZC0wZjlmYTc0MGM1MWIiLCJpYXQiOjE1MTYyMzkwMjIsImV4cCI6MTUxNjMyNTQyMn0.B34FmQuKeksLFrtudQxrn6OwQBwCYeUb1KgWG5q85kA
2. Using a token
To send the signed token to DynaMaker, include it as the URL parameter token:
<iframe src="https://deployed.dynamaker.com/applications/<MY_PROJECT_ID>/?token=eyJhbGciOi..."></iframe>