How To Create Product Configurator
If you don't have a DynaMaker account, start by creating one by visiting app.dynamaker.com/register.
1. Create Product Configurator
In your organization, you can create your first product configurator:
- either in Home, under Create something new? > New Product Configurator, click Create.
- or in Product Configurators & Libraries > + Create > Product Configurator at the top-right.
Notice how the product configurators created show up under Recent activity.
2. Assemble & Publish
Now that you have your product configurator created, let's have a quick overview of what it contains.
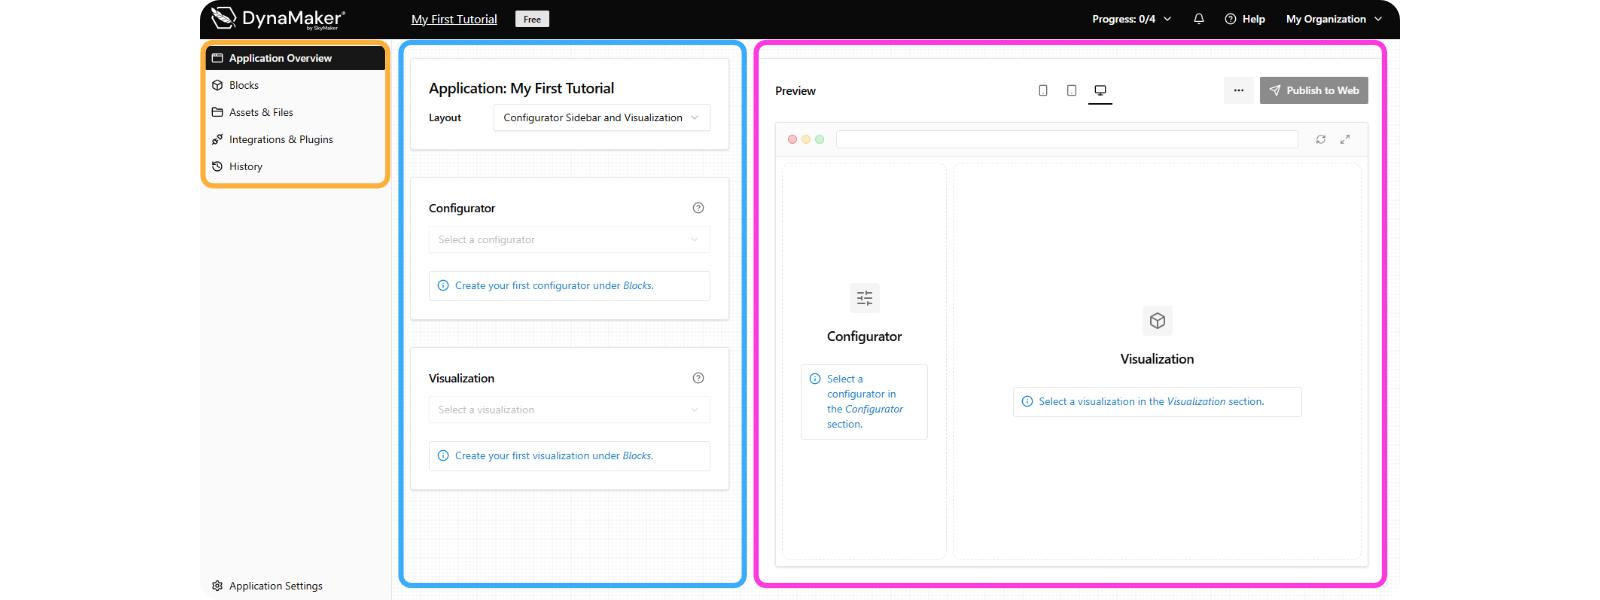
-
Workspaces (orange) as the left sidebar containing:
- Assemble & Publish as the starting point of your workspace. Here, you can view available workspaces, select product configurators, and preview your product configurator.
- Building Blocks is where you create your product configurator logic, visualization and configuration.
- Assets & Files is where you manage the 3D CAD models, images, and textures used in your product configurator.
- Integration & Plugins is where you connect your product configurator to external business systems or export manufacturing data.
- History allows you to track saved changes and manage different versions of your product configurator.
-
Product Configurator Selection (blue) after creating your configuration model and visualization model, select them here to generate a preview of your product configurator.
-
Preview (pink) that displays your completed product configurator and allows you to interact with it as an end user. It shows how the product configurator will look and behave when published.
Here's an example from the tutorial Gym Equipment, where a configuration model and visualization model are chosen to generate the preview of the product configurator: