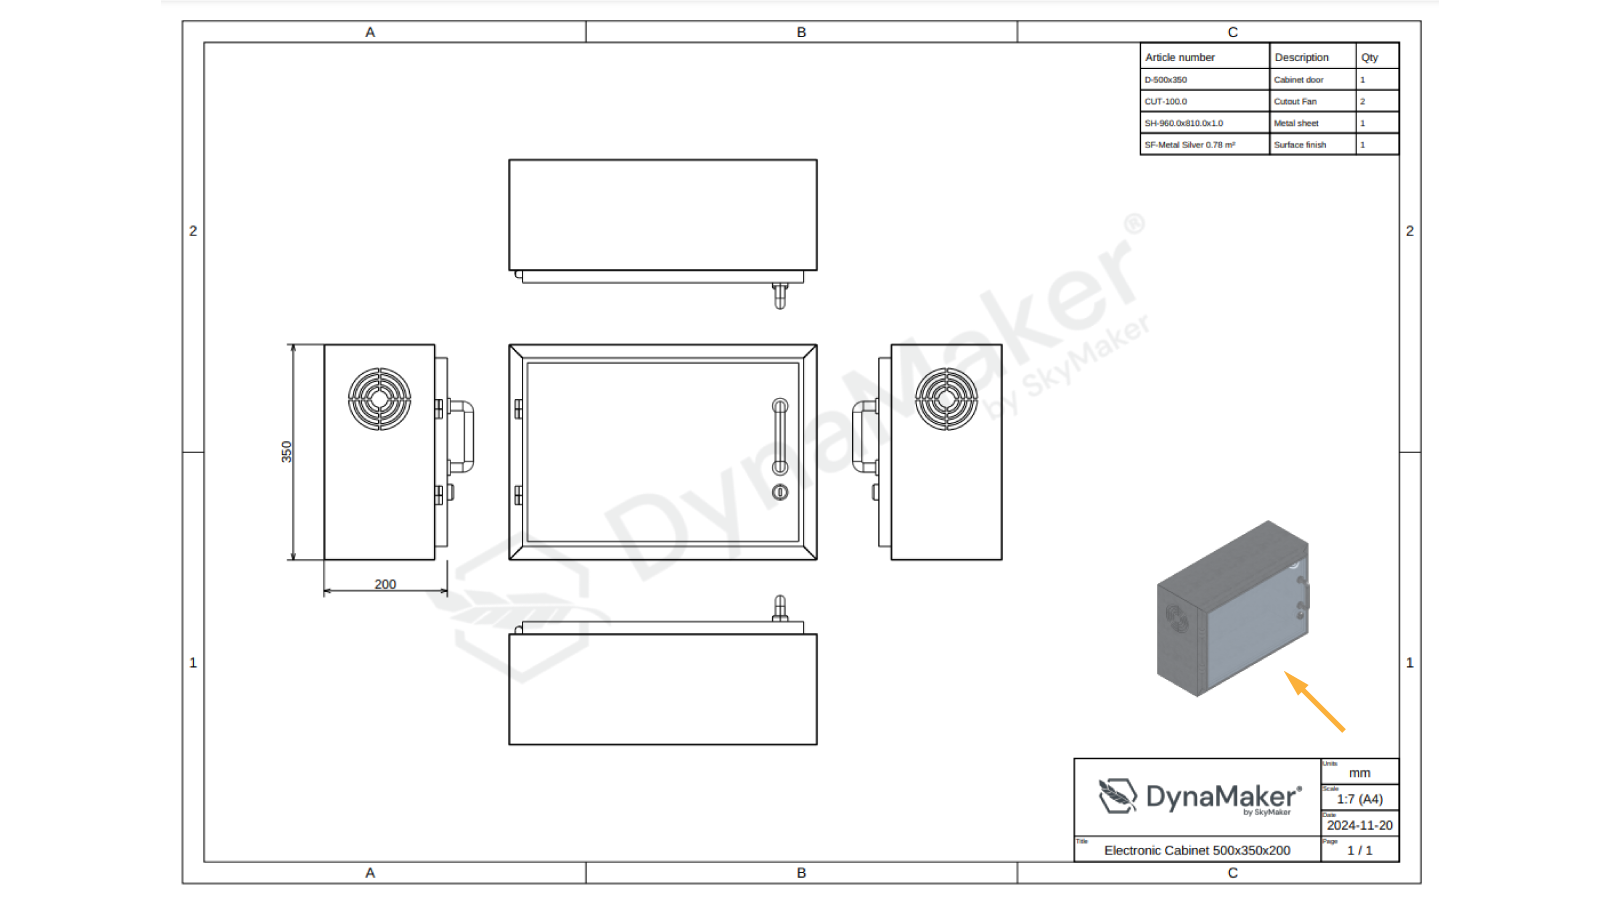
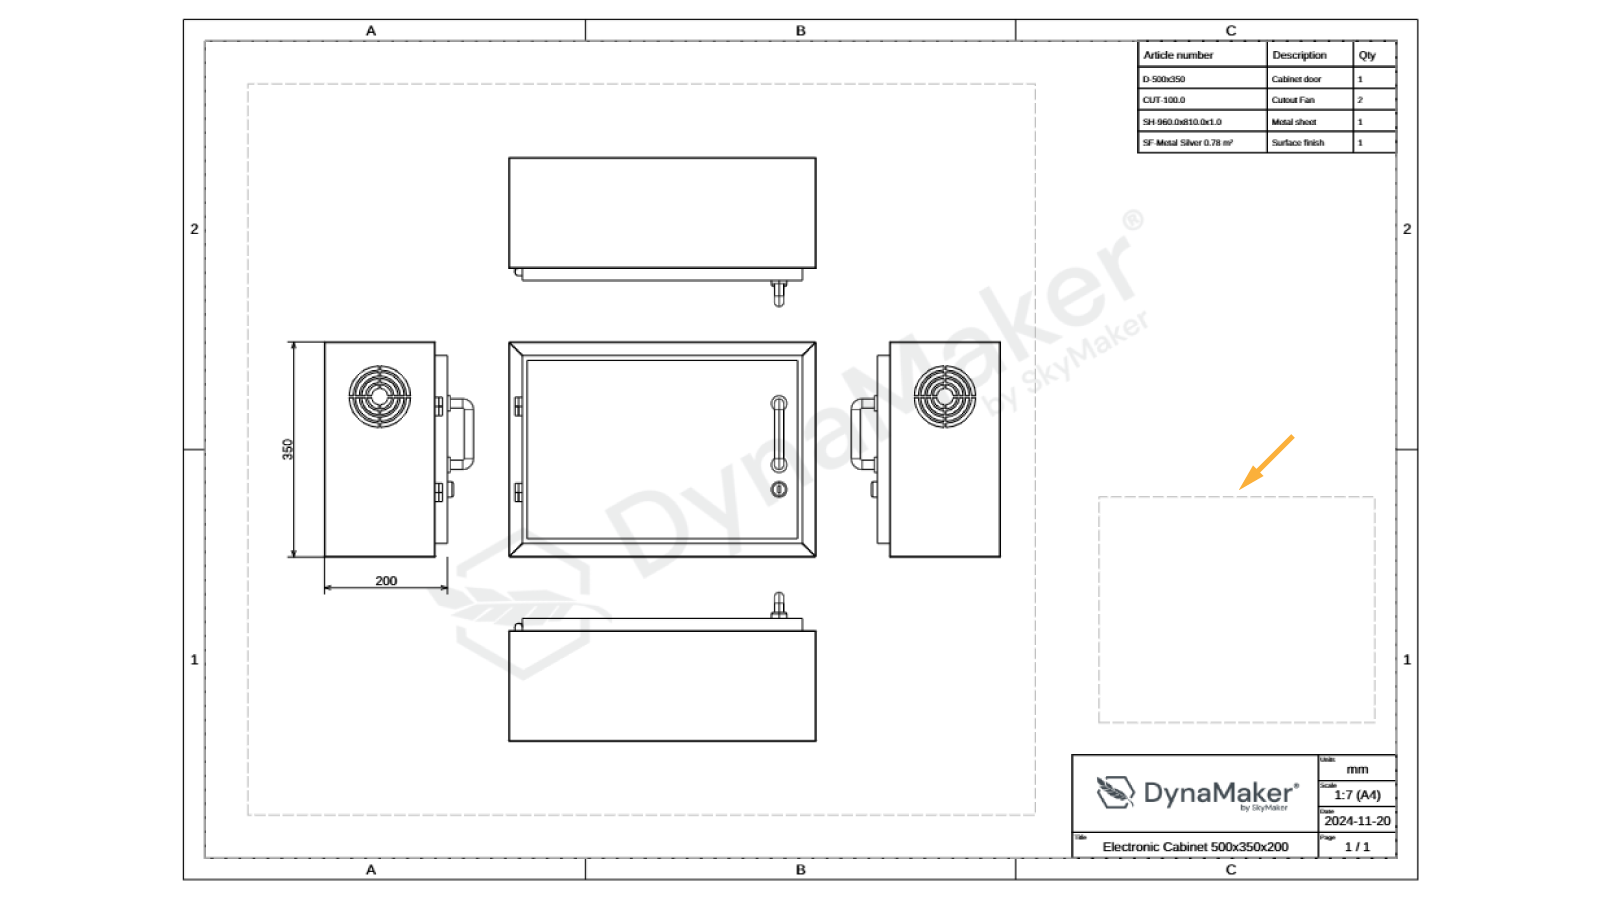
How To Add Pictures In Drawings
In order to add dynamic pictures in your DynaMaker drawings, we will go through these points:
- Take pictures
- Adjust drawing
- Use images in drawing
- Images with different visualization
- Pros & cons vs projections

🎥 Video on Taking pictures.
🎥 Video on Pictures in Drawings.
1. Take Pictures
First off pictures must be taken through a function in ACTIONS in the UI editor. For that keep in mind these 3 points:
requestImage()is to be used (as given in the example from the STUDIO library).manager(a "clone" ofStudiousable within ACTIONS) has to be used for this case.requestImageis an asynchronous function soasyncandawaitare needed for the pictures to "load" properly.
Therefore the function could be the following:
export async function generateViewImages() {
  const isoViewImage = await manager.requestImage({
    type: 'png',
    camera: {
      behavior: 'fit-to-bounds',
      direction: 'iso',
    },
    background: {
      color: new SKYCAD.RgbColor(255, 255, 255, { alpha: 0 }), // alpha: 0 gives transparent background
    },
    disableCastShadows: true, // in case of using scene 'outdoor'
    disableEnvironmentBackground: true, // in case of using HDRIs, for the scene 'room'
    orthographic: true,
    size: new SKYMATH.Vector2D(1200, 800),
  })

  const images = [isoViewImage]

  const resolvedImages = await Promise.all(
    images.map((dataUrl) => {
      return new Promise<HTMLImageElement>((resolve) => {
        const image = new Image()
        image.onload = () => resolve(image)
        image.src = dataUrl
      })
    }),
  )

  return resolvedImages
}
Notice that the images are bundled in a list
images, allowing you to take more pictures and added them to the function.
2. Adjust Drawing Input
Now that the pictures are taken, we can pass them to the drawing. It's best to have another function to fetch the
drawing that could be used for a button or automatic attachments to the quote. For this make sure to have a function
that gets the drawing from the component that handles it, in this case QUOTATIONDRAWING:
export async function generateQuotationDrawing() {
  const assemblyComponent = getAssemblyComponent()
  const images = await generateViewImages()
  const drawing = QUOTATIONDRAWING.generateDrawing(assemblyComponent, images)
  return drawing
}
See that since
generateViewImages()is asynchronous (i.e. returns a promise),asyncandawaitare needed where they correspond.
You will then need to adjust the input of QUOTATIONDRAWING.generateDrawing() so that it takes images as second
input. For this, go to your drawing-component (QUOTATIONDRAWING here) and make sure to have in DRAWING:
export function generateDrawing(assemblyComponent: ASSEMBLY.Component, images: HTMLImageElement[]) {
  const drawing = new SKYDRAWING.Drawing()
  // logic to add content to drawing
  return drawing
}
In PRESETS don't forget to adjust the preset so that it takes a list of images, e.g.:
export const drawingPreset = new PRESET.PresetDrawing(DRAWING.generateDrawing)
drawingPreset.addCase([new ASSEMBLY.Component(), []], { label: 'Default' })
Notice that a 3D visualization is needed to take a picture, since there's none in the drawing editor, an empty list of images
[]has to be entered. Otherwise you can also test this with static images coming from your assets.
3. Use Images in Drawing
As last step, you can use your taken pictures or images as usual. These can be added to your drawing through layouts as usual. Since a list is coming as input in this case, you can distribute them throughout your drawing as you see fit. For example you can add them as following:
const imagesLayout = new SKYCAD.Layout()
const imageBounds = new SKYCAD.Bounds2D(
  new SKYMATH.Vector2D(0.7 * pageWidth, 0.15 * pageHeight),
  new SKYMATH.Vector2D(pageWidth - 2.5 * margin, 0.4 * pageHeight),
)

images.forEach((image) => {
  imagesLayout.addImage(image) // if multiple images are created, handle them here (i.e. adjusting position, just get the iso-view, etc)
})

drawing.addContent(1, imagesLayout, {
  fitInside: {
    bounds: imageBounds,
    validScales: [], // empty list = image will fit with max scale possible
  },
  align: { vertical: 'center', horizontal: 'center' },
})
See that a grey-dashed rectangle will show up in the drawing delimiting the
imageBoundsso you see where the picture will end up. Also notice thatvalidScales: []is used in this case, because we want to fit the image to the rectangle as much as possible.

4. Images with Different Visualization
Now that you have your pictures, you might wonder if the visualization of the picture can be different compared to the visualization. A typical use case is removing dimensions, since the picture should be "clean" for the drawing and not redundant with the regular projections that already contain dimensions. To achieve this states should be used (see other how-to example for a detailed explanation). But basically in the UI editor you need to:
-
in ACTIONS have a state to control different visualizations with their own getter and setter functions:
let showDimensions = true
export function getShowDimensions() {
  return showDimensions
}
export function setShowDimensions(value: boolean) {
  showDimensions = value
} -
in UI have a "custom" geometry function that shows certain parts of the visualization depending on said state via
Studio.setUpdateGeometryFunction():export function onInit() {
Studio.setUpdateGeometryFunction((data: STUDIO.DataForUpdateGeometry, worldControls: STUDIO.WorldControls) => {
const showDimensions = ACTIONS.getShowDimensions()
const excludeTags = showDimensions ? [] : ['dimension']
}
const geometryGroup = data.componentHandler.generateAllGeometry({ excludeTags })
worldControls.updateGeometry(geometryGroup, { groupId: 'main' })
})
// rest of logic to add component, tabs, adjust camera settings, etc
}
Notice that the tag
dimensionis used for geometries that contain exclusively dimensions (i.e.layout.addDimension()), therefore these will be excluded for whenshowDimension = false. You can read more about tags in the STUDIO library here.
Once the custom geometry-update function is adjusted, then the geometry can be updated just right before taking the
picture. So in ACTIONS you can have the following in generateViewImages():
export async function generateViewImages() {
  // 1. Keep old state
  const oldShowDimensions = getShowDimensions()

  // 2. Set new state and update geometry
  setShowDimensions(false)
  await manager.requestGeometryUpdate()

  // 3. Take picture
  const isoViewImage = await manager.requestImage()

  // --- repeat 2 & 3 with more pictures if needed

  // 4. Restore geometry with old state
  setShowDimensions(oldShowDimensions)
  await manager.requestGeometryUpdate()

  // 5. Bundle images in list and resolve
  const images = [isoViewImage]

  const resolvedImages = await Promise.all(
    images.map((dataUrl) => {
      return new Promise<HTMLImageElement>((resolve) => {
        const image = new Image()
        image.onload = () => resolve(image)
        image.src = dataUrl
      })
    }),
  )

  return resolvedImages
}
Don't forget to add await when updating the geometry so that the picture is taken after the geometry is updated.
Great! You can test this app as a result of implemeting taking pictures passed to the drawing:
5. Pros & Cons
To sum up, there are some pros and cons compared to regular projections (SKYCAD.project) to take into account when
using pictures in drawings:
- Pros:
- much much faster to generate since it's just a screenshot.
- pictures contain color & textures.
- pictures shown exactly as in visualization.
- allows extra customization when taking pictures (e.g. perspective view, different background color, etc).
- allows having different visualization options through states (e.g. hiding dimensions).
- Cons:
- pictures come as pixels instead of mm, so it can be tricky to get a picture with a specific scale.
- can only be tested through the UI editor.
- big picture sizes could increase the size of the resulting PDF and therefore its generation time.
- using states for custom visualzation needs the use of
Studio.setUpdateGeometryFunction().