Parts
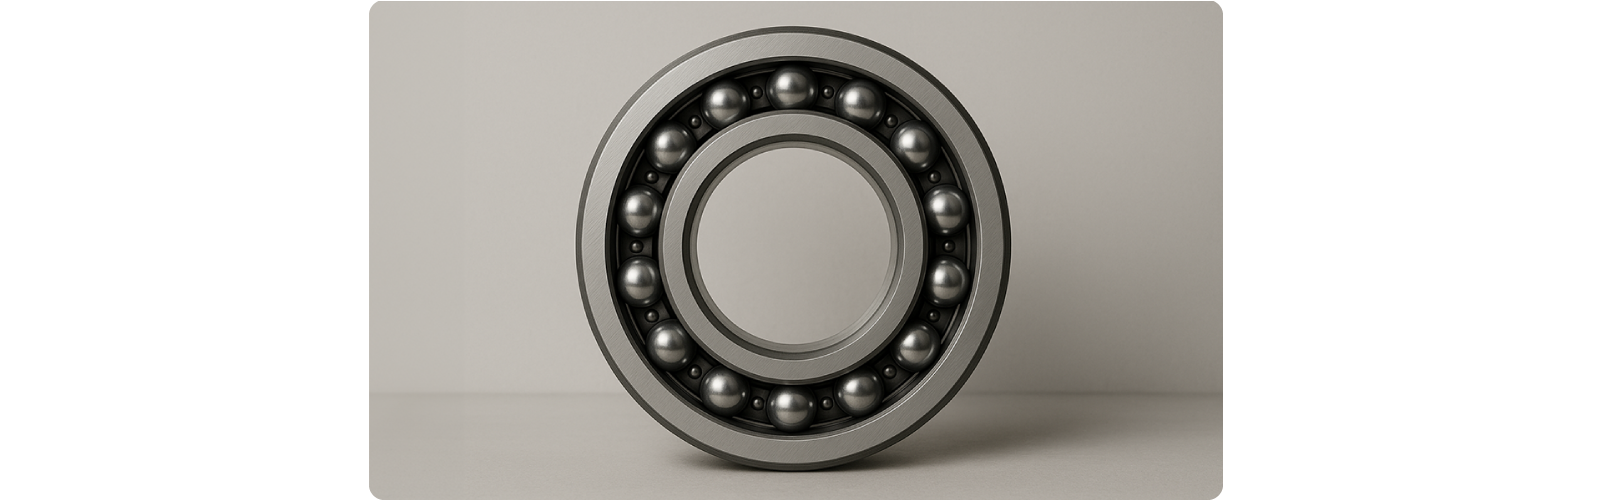
In this tutorial you learn the basics of creating a part (a component) with parametric geometry. The example product is a bearing whose diameter is configurable and whose number of balls updates automatically.
You complete five steps:
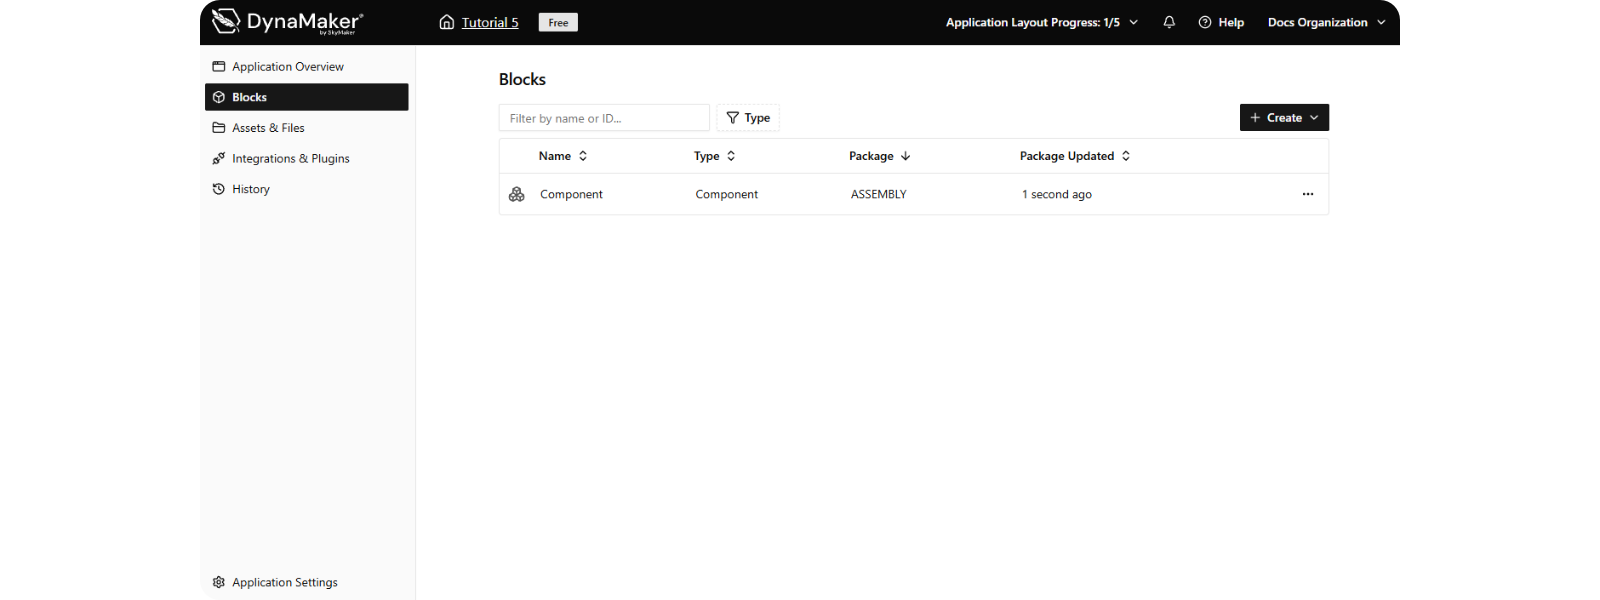
1. Create Component
Create a new component block in your app:
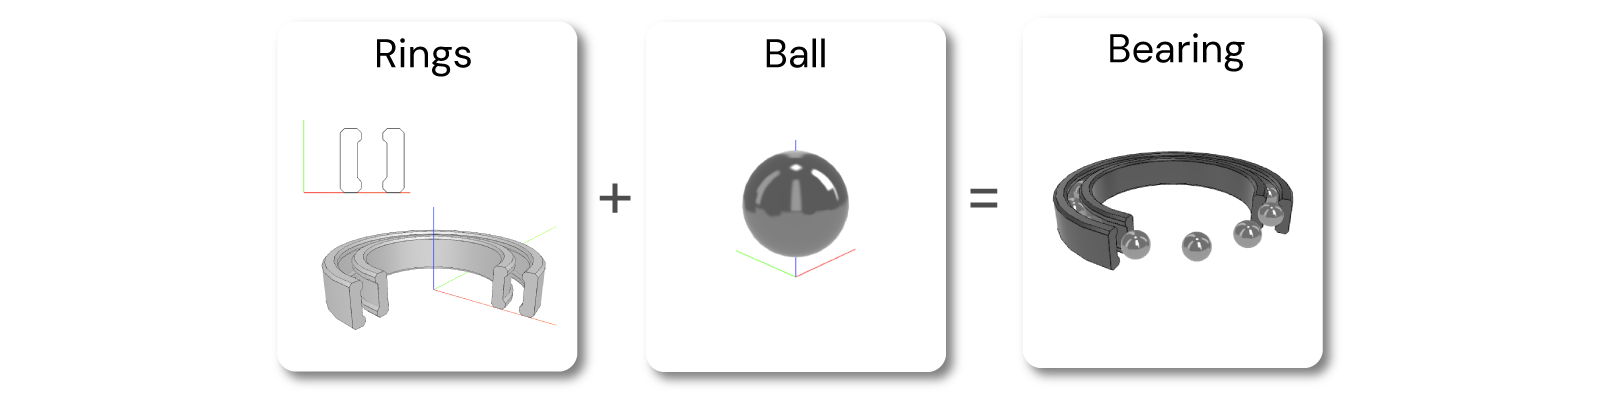
The rings are produced by revolving a profile. The balls are simple spheres. You could model these manually, but for
simplicity this tutorial uses provided static assets. The bearing depends on one property: diameter. The number of
balls and ring positions derive from it.
2. Create models
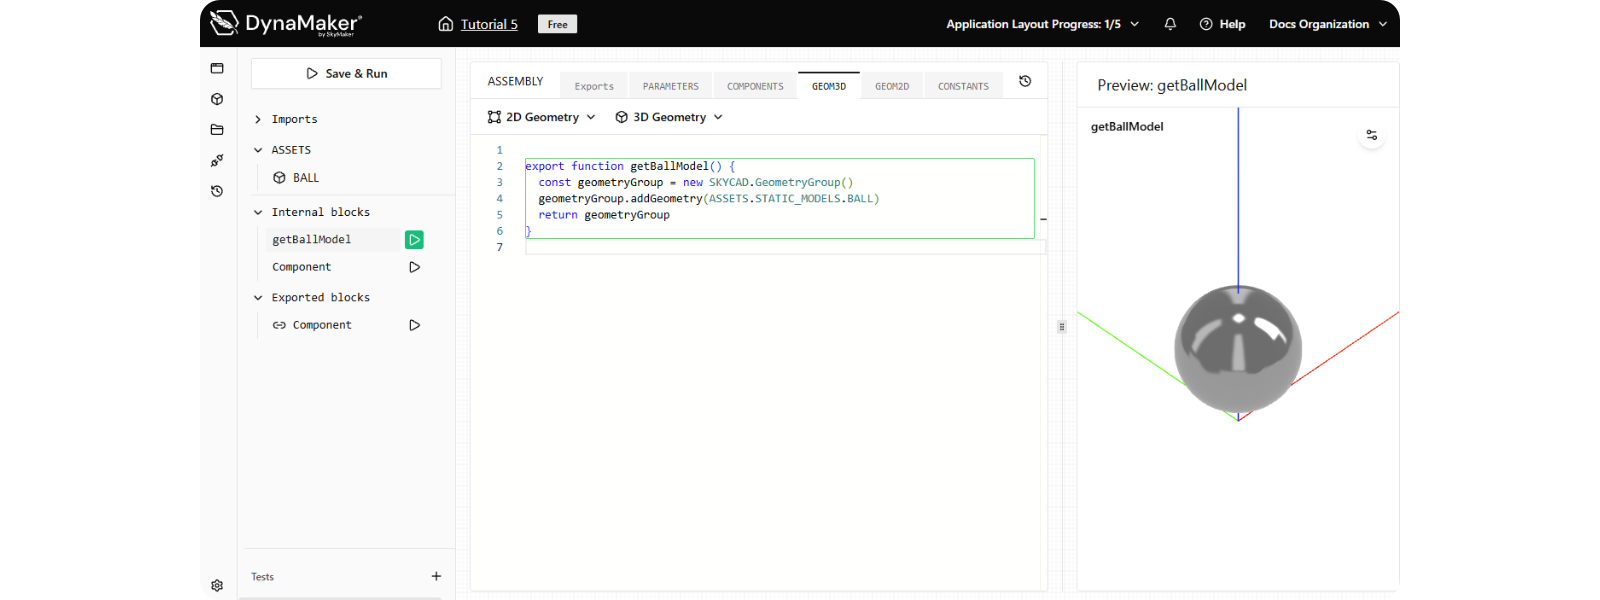
A. Ball
- Download the 3D static asset BALL.glb.
- Click 3D Geometry > Upload (.glb, .stl, .step) > Choose file BALL.glb, then Create.
- Rename function to
getBallModel.
B. Rings
The ring profile is reused for inner and outer rings. For the outer ring you clone, mirror, move, and merge the profile. Use a sketch snippet to work faster.
B1. Sketch
-
Download the 2D static asset RING_PROFILE.dxf.
-
Click 2D Geometry > Sketch > Upload (.dxf) > Choose file RING_PROFILE.dxf, then Create.
-
Rename the function to
getRingProfileSketch, so like you see the inner ring: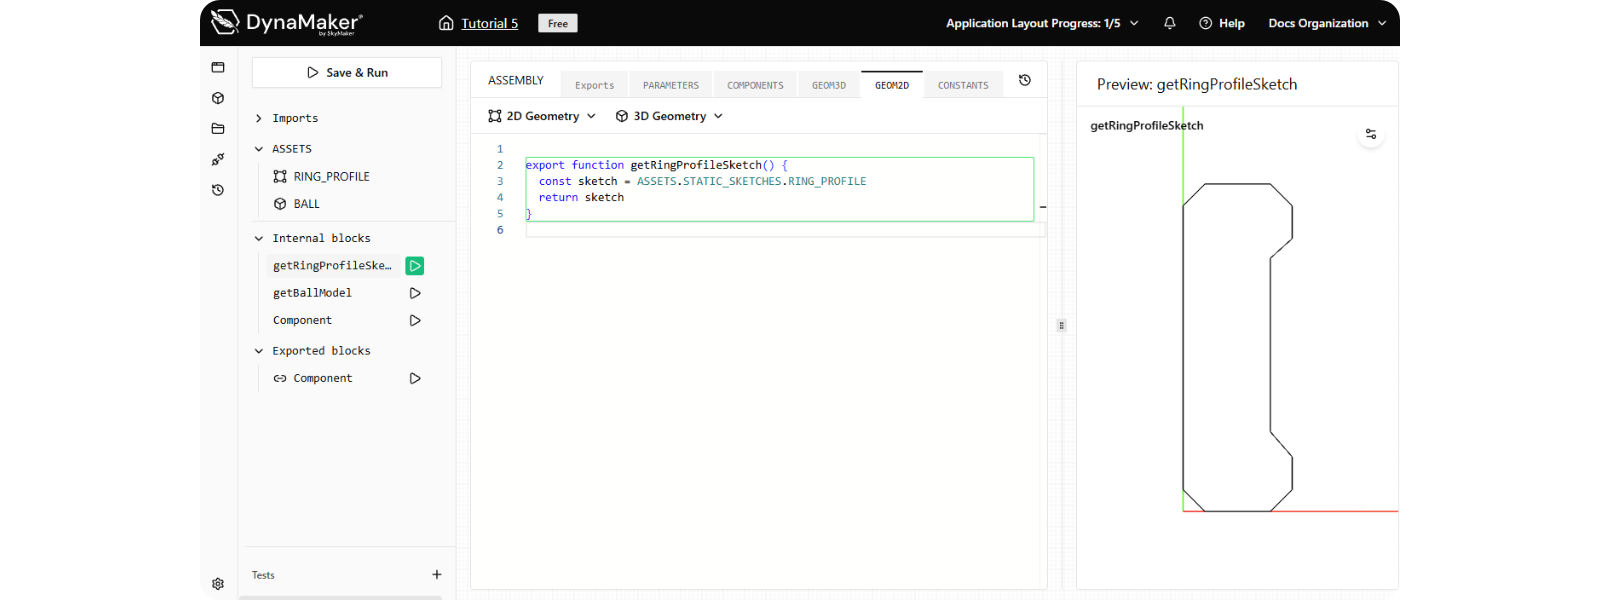
-
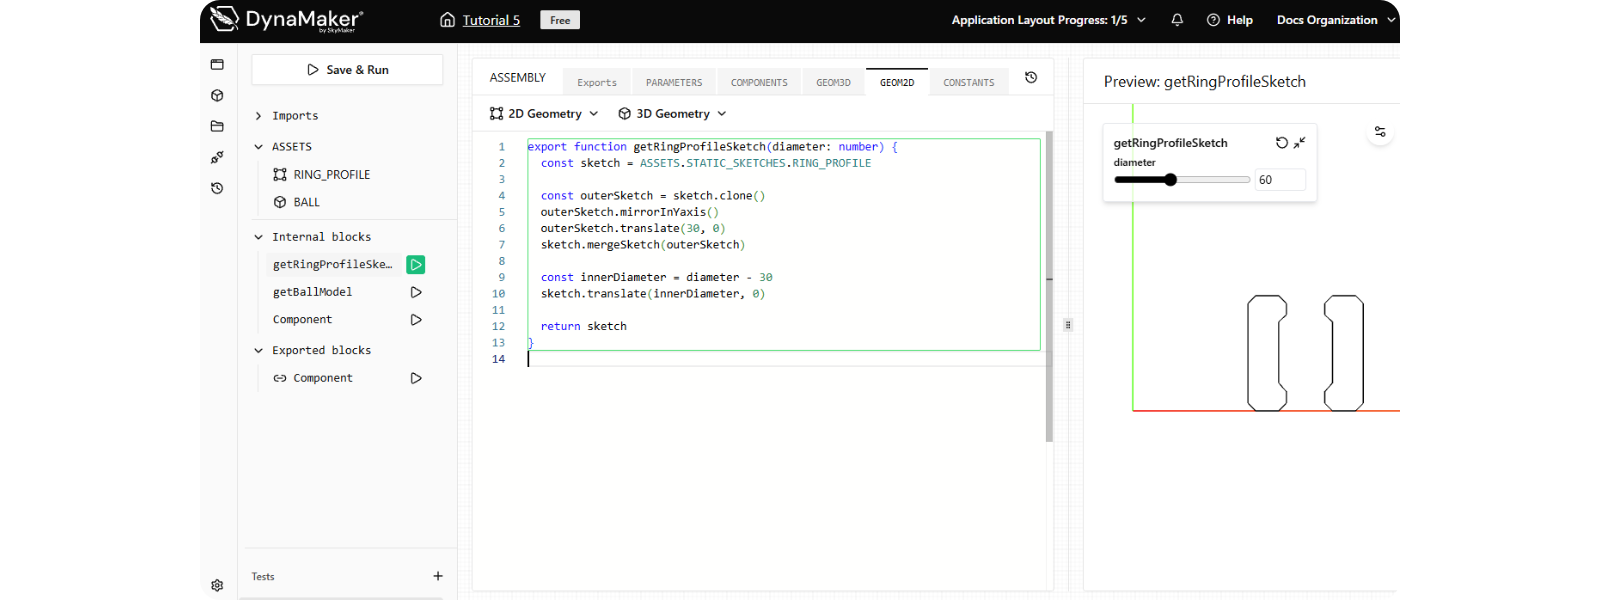
Create the outer ring by cloning and modifying the sketch before the final
returnline:- Clone:
const outerSketch = sketch.clone()(safe copy so the static asset is not modified). - Mirror in Y:
outerSketch.mirrorInYaxis(). - Translate to leave space for the ball:
outerSketch.translate(30, 0). - Merge:
sketch.mergeSketch(outerSketch).
- Clone:
-
After these steps both rings are in place, so the function should look like:
export function getRingProfileSketch() {
  const sketch = ASSETS.STATIC_SKETCHES.RING_PROFILE

  const outerSketch = sketch.clone()
  outerSketch.mirrorInYaxis()
  outerSketch.translate(30, 0)
  sketch.mergeSketch(outerSketch)

  return sketch
} -
Add the input parameter like:
export function getRingProfileSketch(diameter: number) { ... }. -
Adjust for the inner diameter before the final
returnline:- Add:
const innerDiameter = diameter - 30. - Translate in x to account for
innerDiameterand ball diameter:sketch.translate(innerDiameter, 0).
- Add:
-
Final function:
export function getRingProfileSketch(diameter: number) {
  const sketch = ASSETS.STATIC_SKETCHES.RING_PROFILE

  const outerSketch = sketch.clone()
  outerSketch.mirrorInYaxis()
  outerSketch.translate(30, 0)
  sketch.mergeSketch(outerSketch)

  const innerDiameter = diameter - 30
  sketch.translate(innerDiameter, 0)

  return sketch
}
B2. Model
- Click 3D Geometry > Revolve > Template >
getRingProfileSketch, then Create. - Rename the function to
getRingsModel.
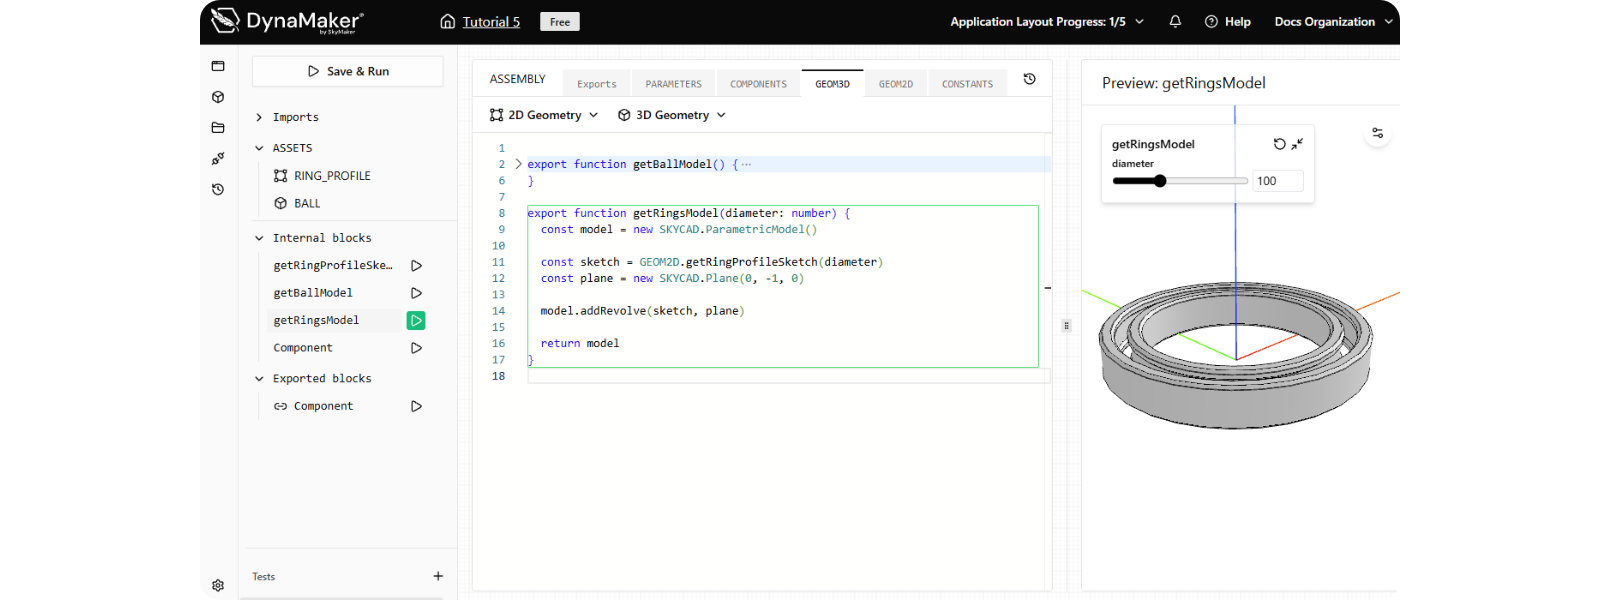
Note diameter is already connected automatically because the sketch takes it as input.
3. Assemble models
Now assemble both models. The ball model will be duplicated in a loop and positioned evenly. The number of balls depends
on diameter.
- In GEOM3D, next to
getBallModelandgetRingsModel, create a third function namedgetBearingGeometry. - Start it with an empty group:
const geometryGroup = new SKYCAD.GeometryGroupand return it. - Add the
diameterinput:export function getBearingGeometry(diameter: number) { ... }.export function getBearingGeometry(diameter: number) {
const geometryGroup = new SKYCAD.GeometryGroup()
return geometryGroup
} - Add the rings model before the
returnline:const ringsModel = getRingsModel(diameter)
geometryGroup.addGeometry(ringsModel) - Add a loop that calculates
nrBallsfromdiameterand positions each ball. You can write your own or use the code below which uses the built-inMathlibrary:const ballModel = getBallModel()
const nrBalls = Math.round(diameter / 8)
const stepAngle = (2 * Math.PI) / nrBalls // [radians]
for (let i = 0; i < nrBalls; i++) {
const position = new SKYMATH.Vector3D(
(diameter - 15) * Math.cos(i * stepAngle), // x-position
(diameter - 15) * Math.sin(i * stepAngle), // y-position
0, // z-position
)
geometryGroup.addGeometry(ballModel, { position })
} - Add a material to the ring:
const ringsModel = getRingsModel(diameter) // highlight-next-line
const ringMaterials = [new SKYCAD.Material({ color: 0x777777, metalness: 1, roughness: 0.3 })]
geometryGroup.addGeometry(ringsModel, { materials: ringMaterials })
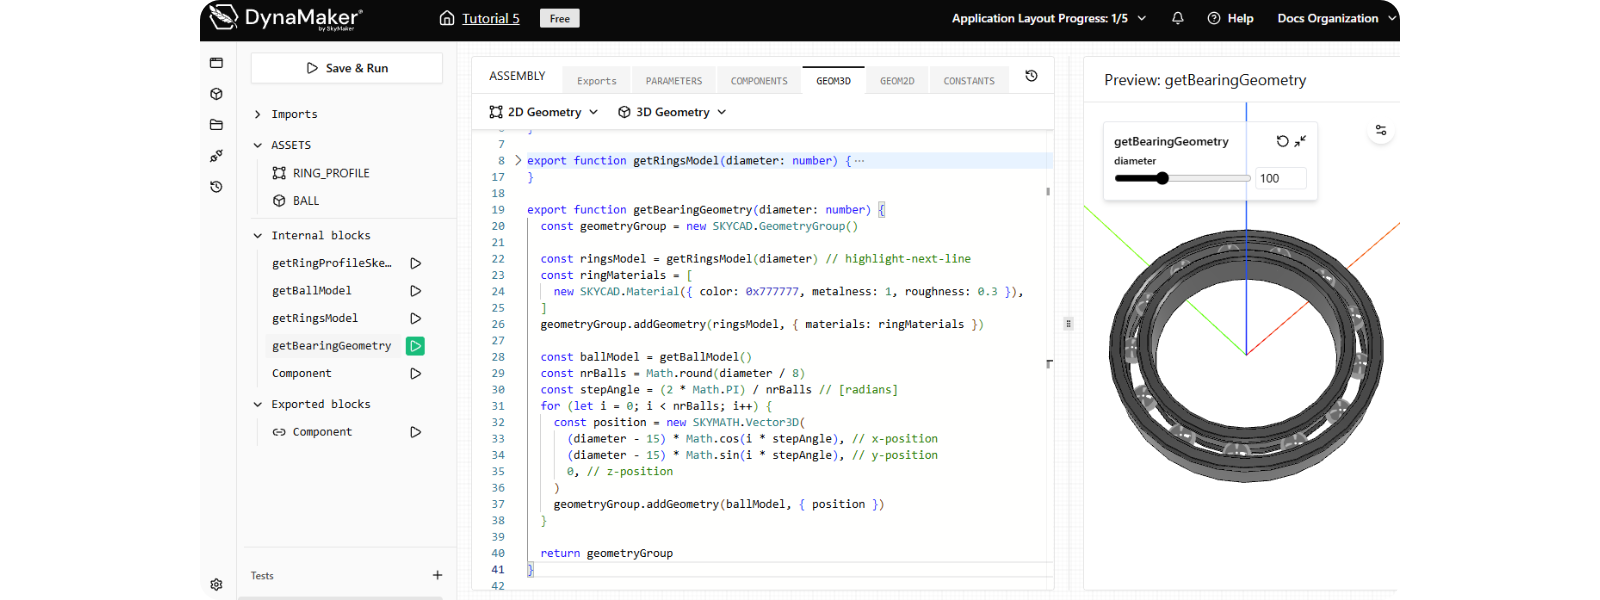
- Final function:
export function getBearingGeometry(diameter: number) {
const geometryGroup = new SKYCAD.GeometryGroup()
const ringsModel = getRingsModel(diameter)
const ringMaterials = [new SKYCAD.Material({ color: 0x777777, metalness: 1, roughness: 0.3 })]
geometryGroup.addGeometry(ringsModel, { materials: ringMaterials })
const ballModel = getBallModel()
const nrBalls = Math.round(diameter / 8) // Math.round ensures an integer number (i.e. without decimals)
const stepAngle = (2 * Math.PI) / nrBalls // 360° in radians divided by nr balls
for (let i = 0; i < nrBalls; i++) {
const position = new SKYMATH.Vector3D(
(diameter - 15) * Math.cos(i * stepAngle), // x-position
(diameter - 15) * Math.sin(i * stepAngle), // y-position
0, // z-position
)
geometryGroup.addGeometry(ballModel, { position })
}
return geometryGroup
}
The ball model already includes a convenient Z offset which simplifies placement. This is not always the case and shows how well oriented static assets can make it easier to model in DynaMaker.
4. Create Part
Now that the geometry depends completely on the single variable diameter, make sure the current component (default so
far) uses this new bearing geometry. Make sure to have the following in COMPONENTS:
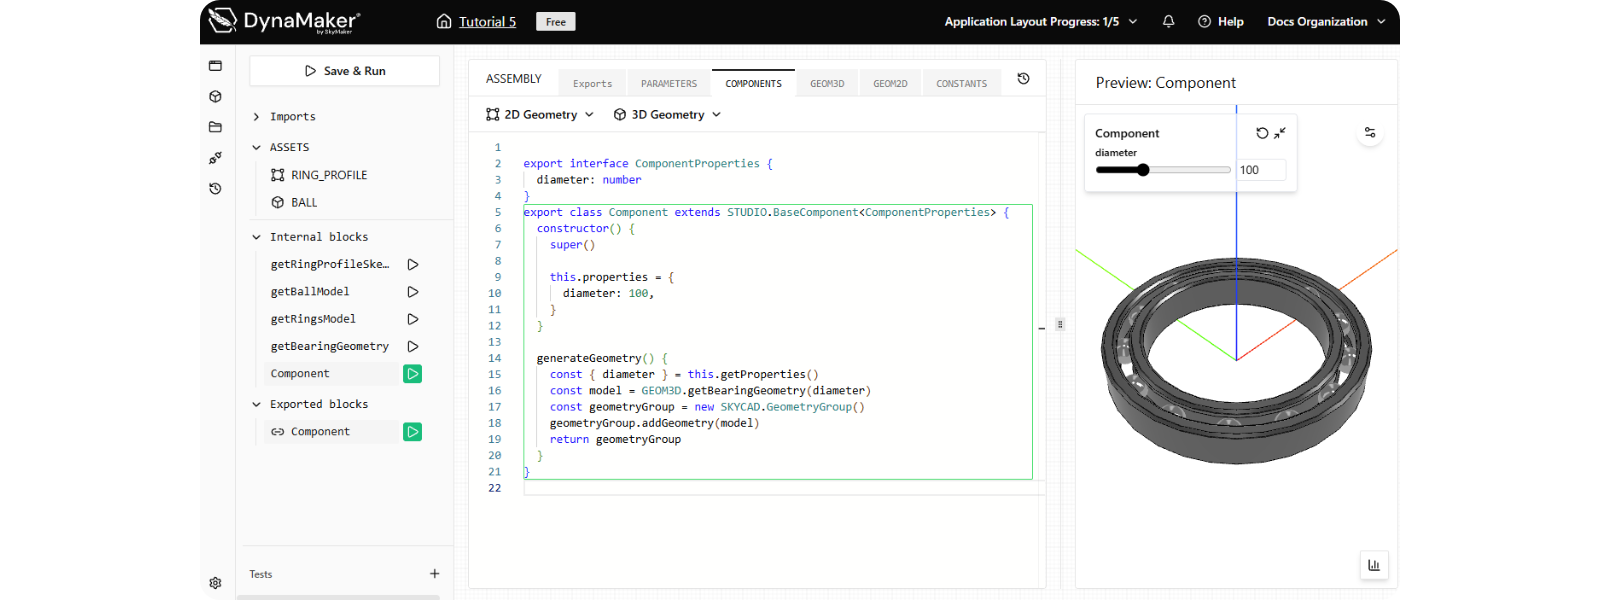
export interface ComponentProperties {
diameter: number
}
export class Component extends STUDIO.BaseComponent<ComponentProperties> {
constructor() {
super()
this.properties = {
diameter: 100, // starting value
}
}
generateGeometry() {
const { diameter } = this.properties
const geometryGroup = new SKYCAD.GeometryGroup()
const model = GEOM3D.getBearingGeometry(diameter)
geometryGroup.addGeometry(model)
return geometryGroup
}
}
Properties define the component and drive its geometry. This is why nrBalls remains inside the geometry logic instead
of e.g. being a property. In this case diameter determines it. A useful rule of thumb: ask yourself Will the user be
able to change a value (for example color) in a configurator? If yes, make it a property. Otherwise keep it as a
constant in the implementation.
Doublecheck the solution code here:
export interface ComponentProperties {
diameter: number
}
export class Component extends STUDIO.BaseComponent<ComponentProperties> {
constructor() {
super()
this.properties = {
diameter: 100,
}
}
generateGeometry() {
const { diameter } = this.getProperties()
const model = GEOM3D.getBearingGeometry(diameter)
const geometryGroup = new SKYCAD.GeometryGroup()
geometryGroup.addGeometry(model)
return geometryGroup
}
}
export function getBallModel() {
const model = ASSETS.STATIC_MODELS.BALL
return model
}
export function getRingsModel(diameter: number) {
const model = new SKYCAD.ParametricModel()
const sketch = GEOM2D.getRingProfileSketch(diameter)
const plane = new SKYCAD.Plane(0, -1, 0)
model.addRevolve(sketch, plane)
return model
}
export function getBearingGeometry(diameter: number) {
const geometryGroup = new SKYCAD.GeometryGroup()
const ringsModel = getRingsModel(diameter)
const ringMaterials = [new SKYCAD.Material({ color: 0x777777, metalness: 1, roughness: 0.3 })]
geometryGroup.addGeometry(ringsModel, { materials: ringMaterials })
const ballModel = getBallModel()
const nrBalls = Math.round(diameter / 8)
const stepAngle = (2 * Math.PI) / nrBalls // [radians]
for (let i = 0; i < nrBalls; i++) {
  const position = new SKYMATH.Vector3D(
    (diameter - 15) * Math.cos(i * stepAngle), // x-position
    (diameter - 15) * Math.sin(i * stepAngle), // y-position
    0, // z-position
  )
  geometryGroup.addGeometry(ballModel, { position })
}
return geometryGroup
}
export function getRingProfileSketch(diameter: number) {
  const sketch = ASSETS.STATIC_SKETCHES.RING_PROFILE

  const outerSketch = sketch.clone()
  outerSketch.mirrorInYaxis()
  outerSketch.translate(30, 0)
  sketch.mergeSketch(outerSketch)

  const innerDiameter = diameter - 30
  sketch.translate(innerDiameter, 0)

  return sketch
}
You now know how to create components. Continue with the next tutorial to build an assembly with multiple components: Assemblies.