Publishing Apps
Publishing an app in DynaMaker is straightforward. In this tutorial you learn the basics.
Use any app you have built that already has a working component (and ideally configurator), no matter how polished it is. This tutorial does not require coding, only a few clicks.
You complete two steps:
1. Publish Online
When you are done with your components and configurator, you can then publish online. Then you will:
a) set up the application preview
b) publish to web
A. App Preview
Taking Tutorial 8 as example:
- Choose the following options:
- Layout > Configurator Sidebar and Visualization (default UI).
- Visualization > Component (in package ASSEMBLY).
- Configurator > configurator.
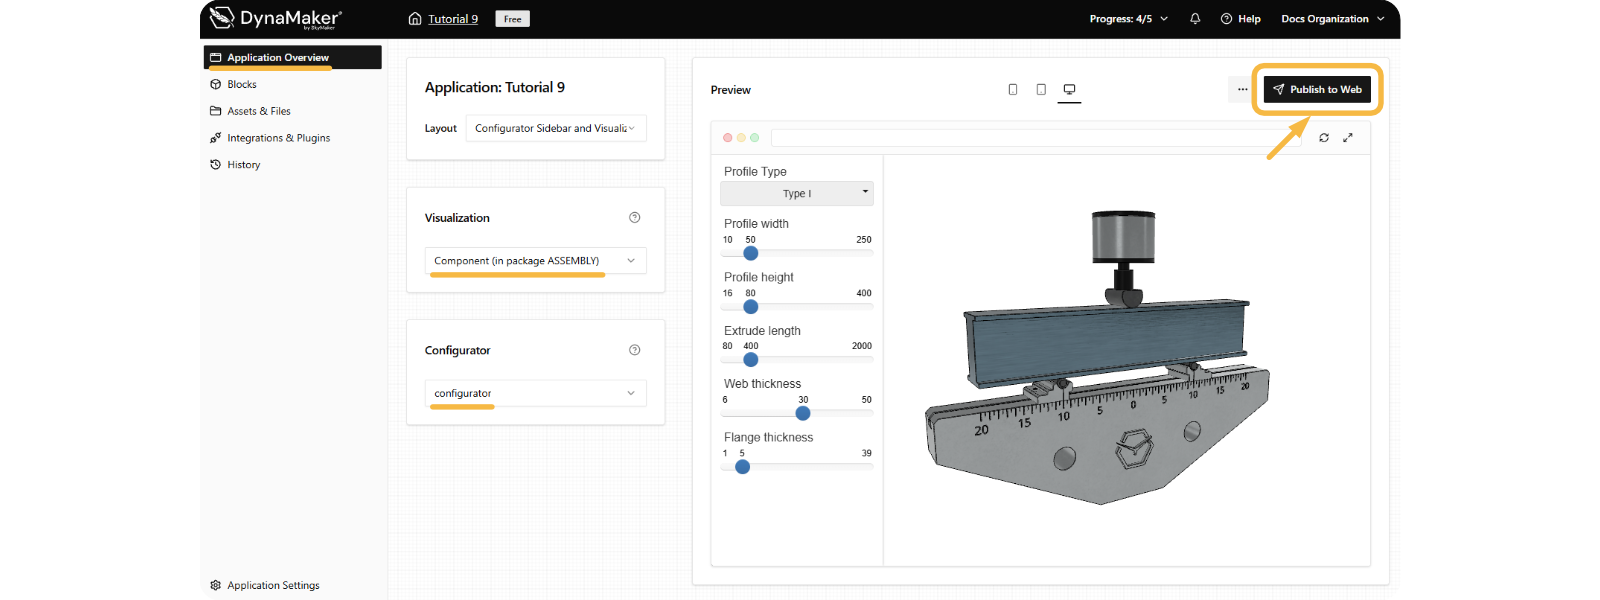
Notice how the preview on the right updates depending on the options chosen.
B. Publish To Web
- Click on Publish to Web.
- Assign a bought subscription (keep reading the tutorial if you don't have a subscription yet):
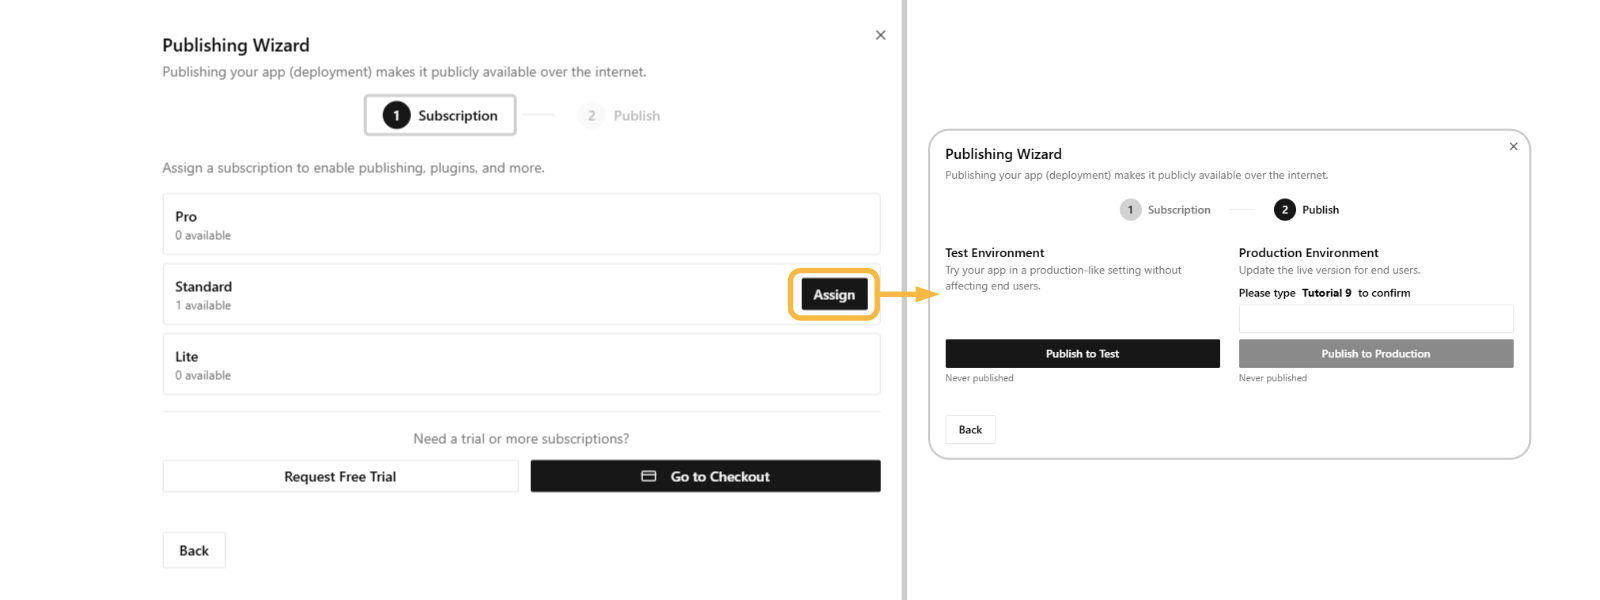
- Click Publish to Test to make your app online ready for testing.
- Click Publish to Production to make your app online ready for the end user.
2. Understand Publishment
Your application can exist in three environments:
- Editors: what you as an engineer work with continuously, and what the user never sees.
- Test site: published app meant to show experimental changes, typically for user testing.
- Production site: published (error-free) app meant to be used by the user, it must be polished.
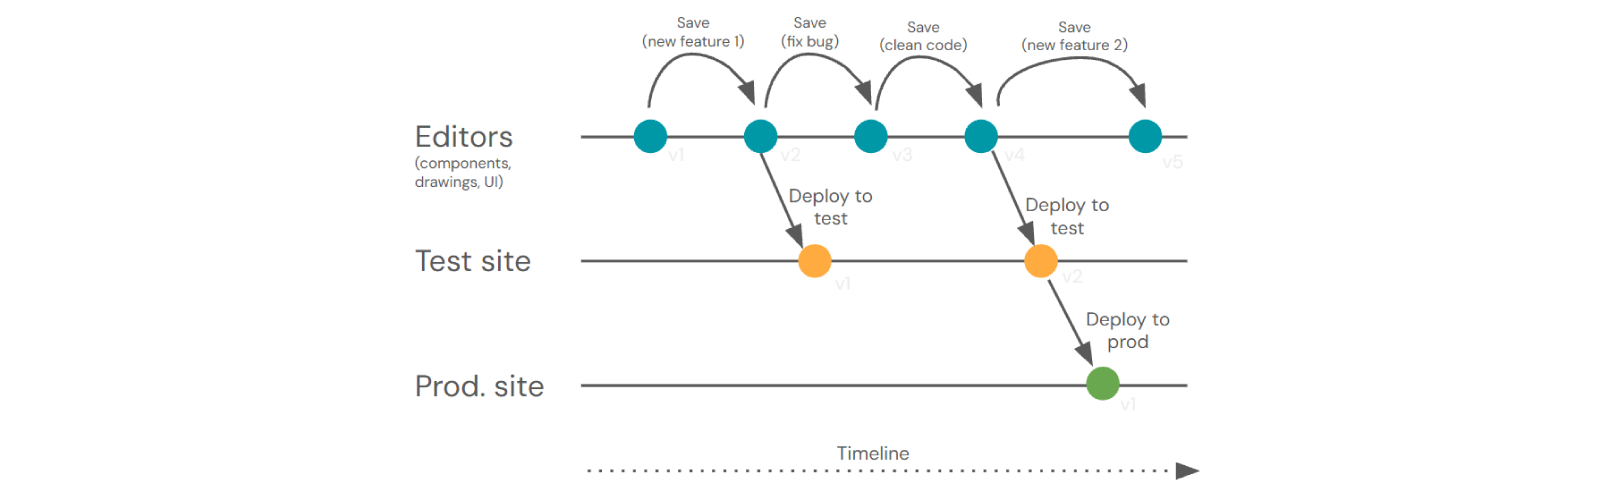
The typical workflow of publishing an app (see picture above) is:
- Building App: Engineer builds the app based on requirements (editors v1).
- Implementation: Engineer adds the feature (editors v1 → v2).
- Internal Testing: publish to the Test site (test v1) and share the URL with e.g. Sales for feedback.
- Bug Fixing & Improvements: if Sales reports issues, engineer fixes them, improves code (editors v2 → v3 → v4), and republishes to Test site (test v2) for re-review.
- Approval & Release: once approved, publish to Production site (prod v1) and give Sales the customer-ready link.
- Next Cycle: Sales gathers new feature requests while customers use the current version; engineer works on them in editors (v4 → v5), then repeats the cycle.
Do you want to create your own User Interface with buttons, extra configurators, tabs and more functionalities? Learn the basics in the next tutorial Custom UI.