Assemblies
In this tutorial, you will learn how to create an assembly, which is essentially a component with subcomponents, following the configurable size. As a product example, we will use a configurable indoor staircase consisting of steps and glass railings.

For this we will follow 2 steps:
1. Prepare Subcomponents
Let's start with the subcomponents of the staircase STAIRSTEP and RAILING.
A. StairStep
As for the step, we will only change its default properties and its color.
- Go to the app dashboard and create a new component block with package name STAIRSTEP.

- Inside the editor, change the existing component default properties' values to the following:
constructor() {
  super()

  this.properties = {
   width: 200,
   depth: 500,
   height: 20,
  }
}
- In
generateGeometry(), add a material to the model when being added to thegeometryGroup:
// change this line:
geometryGroup.addGeometry(model)

// to this other to include the material:
geometryGroup.addGeometry(model, {
  materials: [new SKYCAD.Material({ color: new SKYCAD.RgbColor(196, 164, 132) })],
})
- Save & Update to apply the changes.

Resulting function under COMPONENTS:
export interface ComponentProperties {
  width: number
  depth: number
  height: number
}
export class Component extends STUDIO.BaseComponent<ComponentProperties> {
  constructor() {
    super()

    this.properties = {
      width: 200,
      depth: 500,
      height: 20,
    }
  }

  generateGeometry() {
    const width = this.properties.width
    const depth = this.properties.depth
    const height = this.properties.height

    const sketch = SKYCAD.generateRectangleSketch(0, 0, width, depth)
    const plane = new SKYCAD.Plane()
    const model = new SKYCAD.ParametricModel()
    model.addExtrude(sketch, plane, height)

    const geometryGroup = new SKYCAD.GeometryGroup()
    geometryGroup.addGeometry(model, {
      materials: [new SKYCAD.Material({ color: new SKYCAD.RgbColor(196, 164, 132) })],
    })
    return geometryGroup
  }
}
B. Railing
Here we will create its side sketch, then extrude it, and then create a component from this.
B1. Sketch
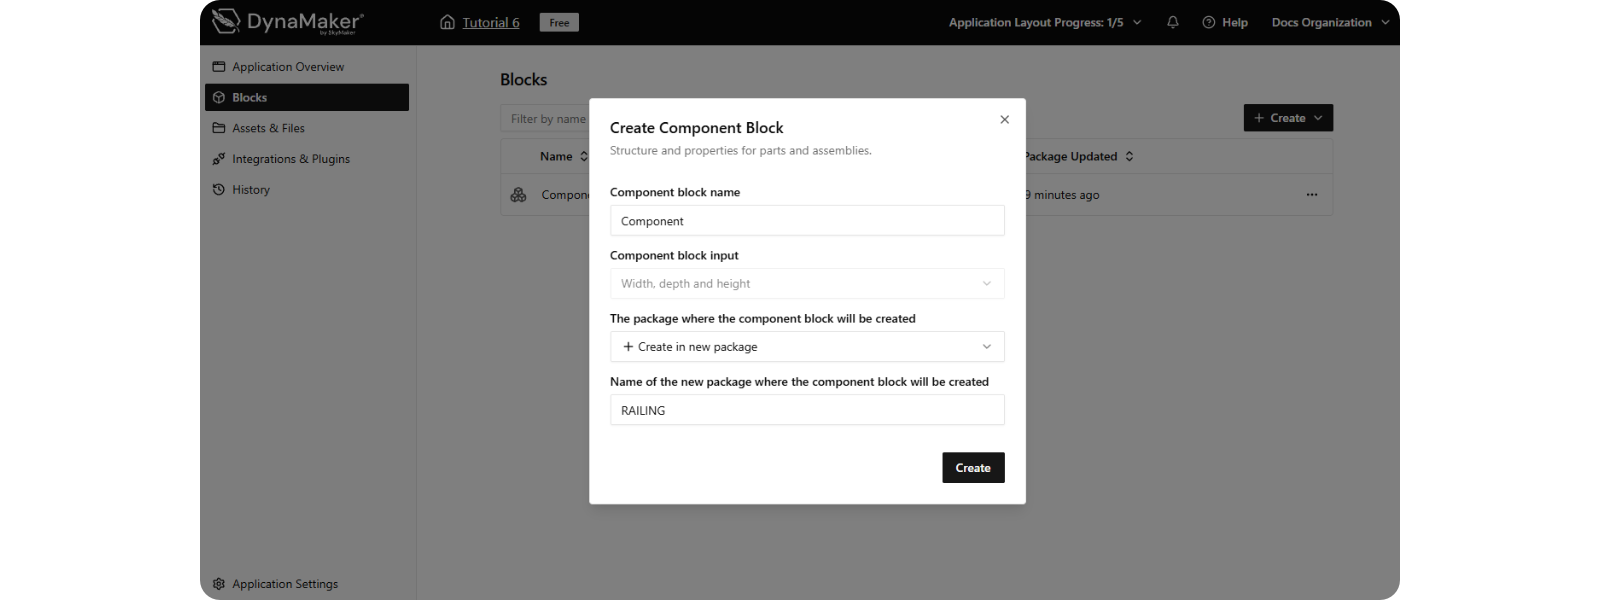
- Go back to Blocks (2nd button on the very left sidebar)
- Create a new component block in a new package called RAILING.
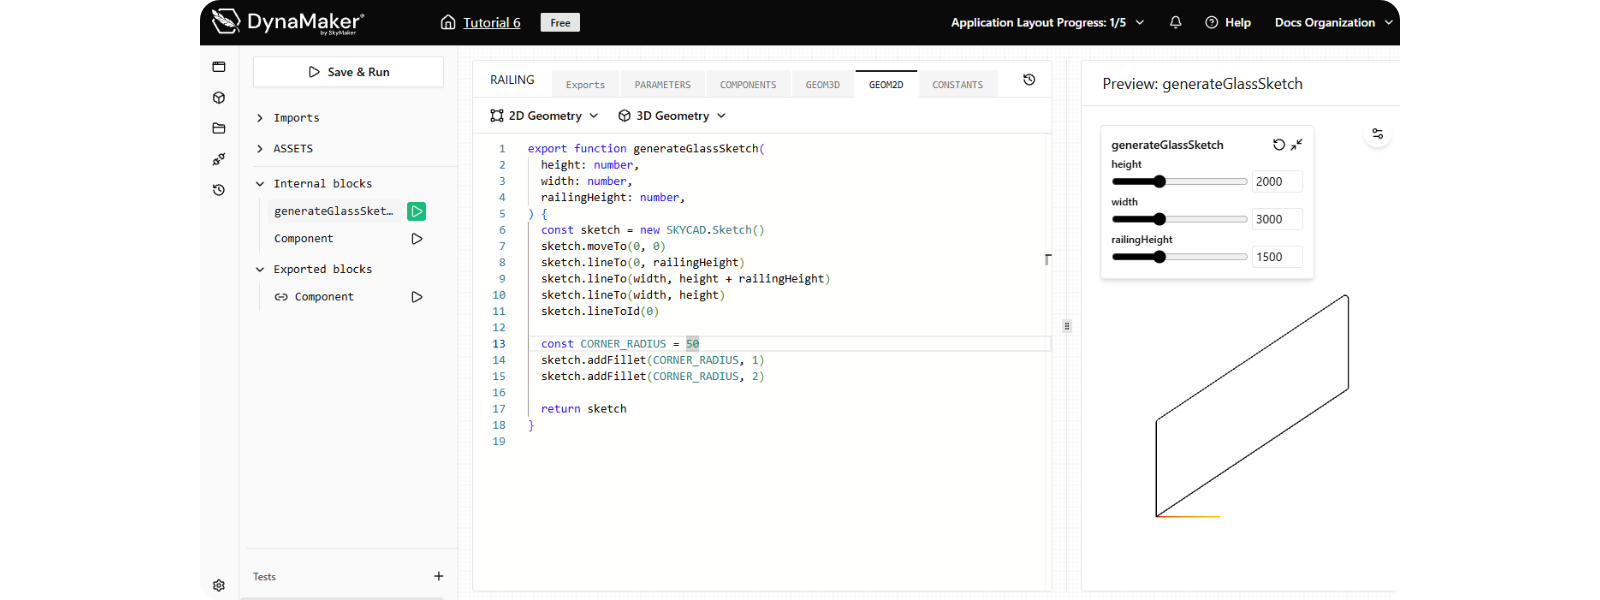
- Inside the editor, create a sketch (via any snippet) for the side railing as a glass panel with some rounded corners,
that depends on
height,widthandrailingHeight, like:
export function generateGlassSketch(height: number, width: number, railingHeight: number) {
  const sketch = new SKYCAD.Sketch()
  sketch.moveTo(0, 0)
  sketch.lineTo(0, railingHeight)
  sketch.lineTo(width, height + railingHeight)
  sketch.lineTo(width, height)
  sketch.lineToId(0)

  const CORNER_RADIUS = 50
  sketch.addFillet(CORNER_RADIUS, 1)
  sketch.addFillet(CORNER_RADIUS, 2)

  return sketch
}
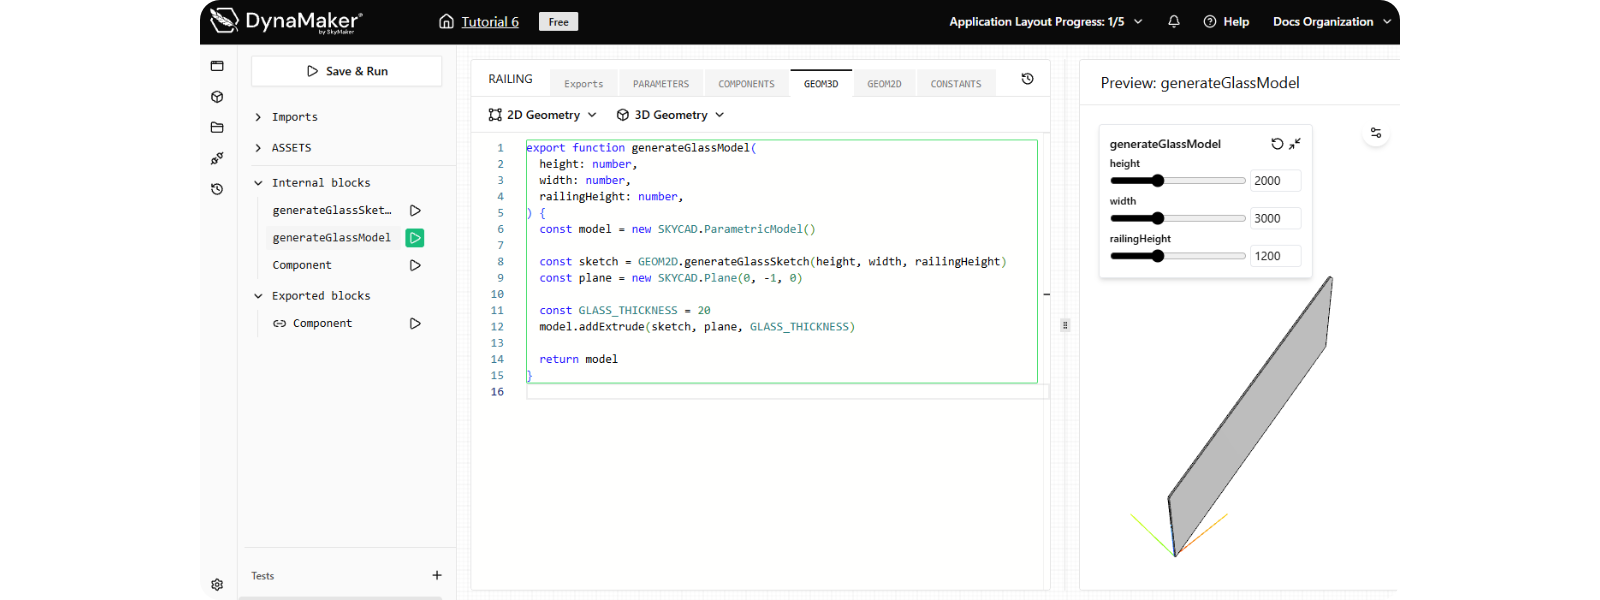
B2. Model
- Create a model (via the 3D Geometry > Extrude snippet) from this sketch.
- Replace
extrudedLengthwith a constant (e.g.const GLASS_THICKNESS = 20). - Change extrusion direction to negative y-axis (i.e.
const plane = new SKYCAD.Plane(0, -1, 0)) for an easier placement later. - The resulting function could look like:
export function generateGlassModel(height: number, width: number, railingHeight: number) {
  const model = new SKYCAD.ParametricModel()

  const sketch = GEOM2D.generateGlassSketch(height, width, railingHeight)
  const plane = new SKYCAD.Plane(0, -1, 0)

  const GLASS_THICKNESS = 20
  model.addExtrude(sketch, plane, GLASS_THICKNESS)

  return model
}
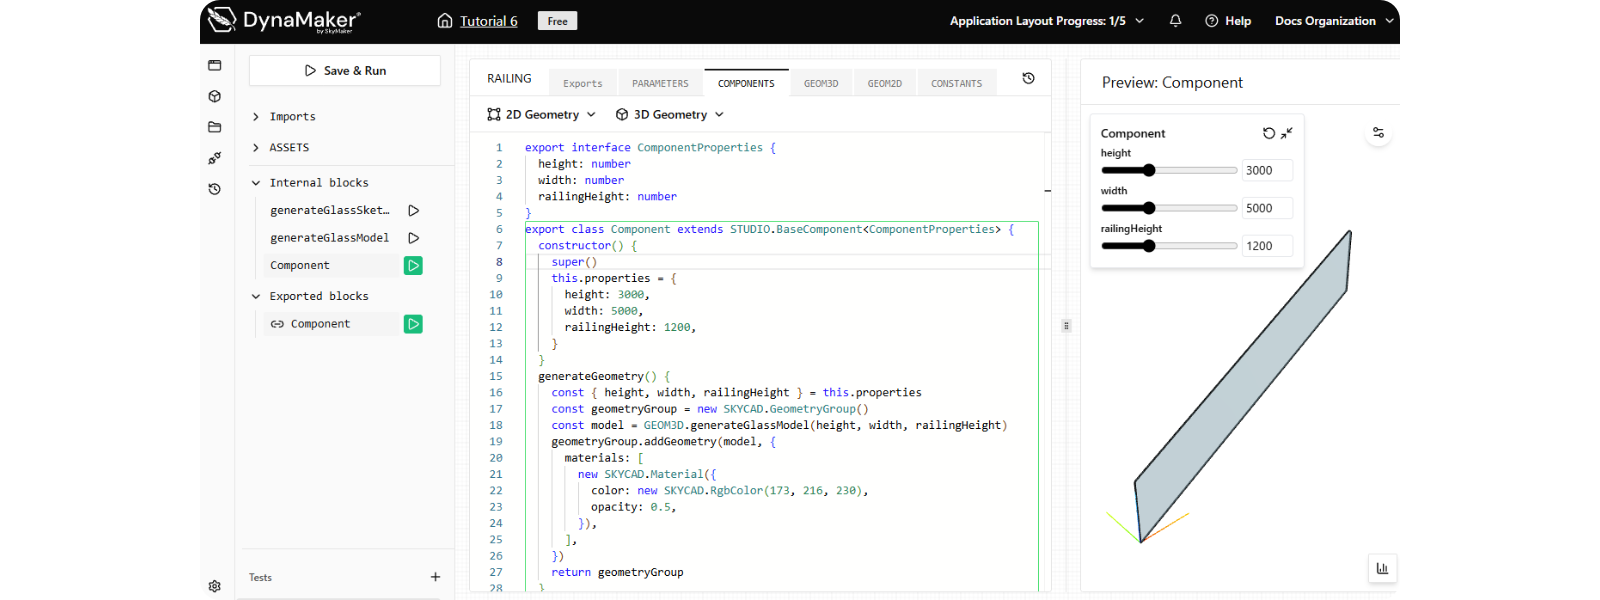
B3. Component
- Under COMPONENTS reuse the default template.
- Update default values of the properties to have a good initial staircase (e.g.
height: 3000,width: 5000,railingHeight: 1200) - Add some material to the model as light blue with some transparency (e.g.
opacity: 0.5). - The finsihed component should look like:
export interface ComponentProperties {
  height: number
  width: number
  railingHeight: number
}
export class Component extends STUDIO.BaseComponent<ComponentProperties> {
  constructor() {
    super()
    this.properties = {
      height: 3000,
      width: 5000,
      railingHeight: 1200,
    }
  }
  generateGeometry() {
    const { height, width, railingHeight } = this.properties
    const geometryGroup = new SKYCAD.GeometryGroup()
    const model = GEOM3D.generateGlassModel(height, width, railingHeight)
    geometryGroup.addGeometry(model, {
      materials: [new SKYCAD.Material({ color: new SKYCAD.RgbColor(173, 216, 230), opacity: 0.5 })],
    })
    return geometryGroup
  }
}
2. Build Assembly
In the app dashboard, create a third component block with in a new package with name ASSEMBLY.
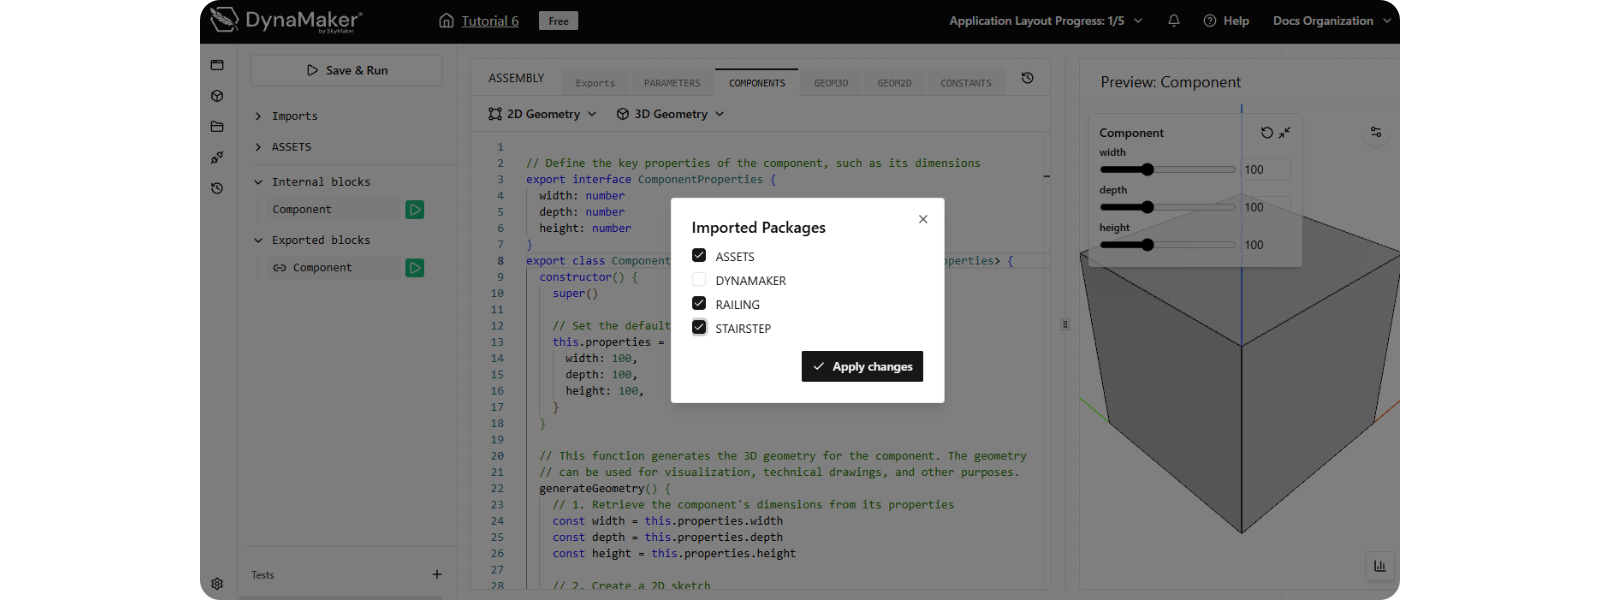
A. Import Components
First off, to be able to use the components Railing & StairStep in Assembly, you need to import them.
- In the left sidebars click IMPORTS..._ and select _STAIRSTEP_ and RAILING, then Apply changes.
B. Create Assembly
Have the following in COMPONENTS:
export interface ComponentProperties {}
export class Component extends STUDIO.BaseComponent<ComponentProperties> {
  constructor() {
    super()

    this.properties = {}

    this.update() // don't forget this line to generate subcomponents!
  }

  update() {
    this.componentHandler.clearAll()

    const stairstepComponent = new STAIRSTEP.Component()
    this.componentHandler.add(stairstepComponent)

    const railingComponent = new RAILING.Component()
    this.componentHandler.add(railingComponent)
  }

  generateGeometry() {
    return this.componentHandler.generateAllGeometry()
  }
}
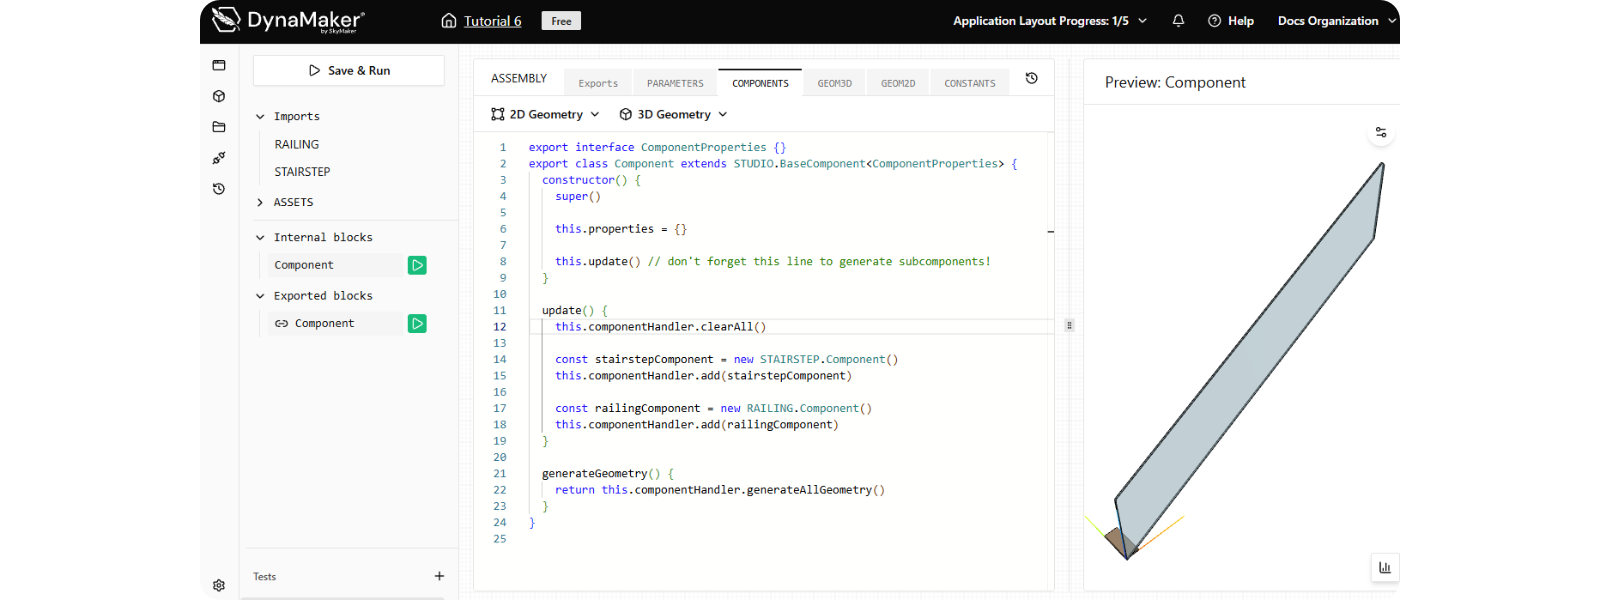
Notice how the componentHandler takes care of clearing all and then adding these subcomponents to the assembly in
update(), and it simply generates all geometry from them accordingly in generateGeometry().
C. Update Subcomponents
Now that the subcomponents are in placed, it's time to add some properties and update them!
C1. Default properties
Let's add 4 properties to these component like the following in both their definition (ComponentProperties) and in
this.properties like:
export interface ComponentProperties {
  width: number
  depth: number
  height: number
  railingHeight: number
}
export class Component extends STUDIO.BaseComponent<ComponentProperties> {
  constructor() {
    super()

    this.properties = {
      width: 5000,
      depth: 500,
      height: 3000,
      railingHeight: 1200,
    }

    this.update()
  }

  update() {
    // logic for update()
  }

  generateGeometry() {
    // logic for generateGeometry()
  }
}
C2. Update RAILING
In update() pass the properties to the RAILING component like:
update() {
  const { width, depth, height, railingHeight } = this.getProperties()
  this.componentHandler.clearAll()

  const railingComponent = new RAILING.Component()
  railingComponent.setProperties({ height, railingHeight, width })
  this.componentHandler.add(railingComponent)

  const stairstepComponent = new STAIRSTEP.Component()
  this.componentHandler.add(stairstepComponent)
}
Notice the syntax to directly fetching the properties via this.getProperties(). Otherwise you can also create each
property like:
const width = this.properties.width
// OR
const width = this.getProperty('width')
At this point you can play around with height, railingHeight or width and see how the railing changes in the
visualization.
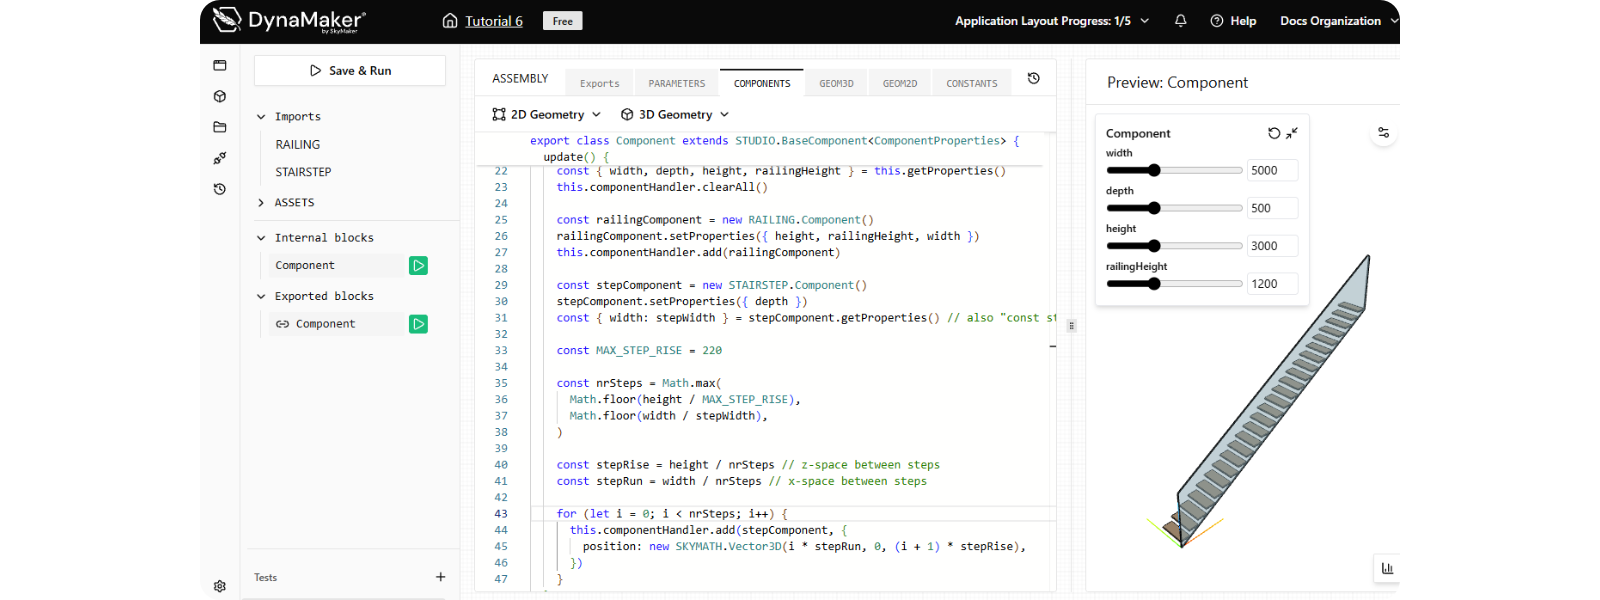
C3. Update STAIRSTEP
Similarly to the geometry of the bearing from tutorial 5, we will add some logic to distribute the step components equally throughout the railing to build the staircase with the help of some for-loop. E.g.:
update() {
  const { width, depth, height, railingHeight } = this.getProperties()
  this.componentHandler.clearAll()

  const railingComponent = new RAILING.Component()
  railingComponent.setProperties({ height, railingHeight, width })
  this.componentHandler.add(railingComponent)

  const stepComponent = new STAIRSTEP.Component()
  stepComponent.setProperties({ depth })
  const { width: stepWidth } = stepComponent.getProperties() // also "const stepWidth = stepComponent.getProperty('width')"

  const MAX_STEP_RISE = 220

  const nrSteps = Math.max(Math.floor(height / MAX_STEP_RISE), Math.floor(width / stepWidth))

  const stepRise = height / nrSteps // z-space between steps
  const stepRun = width / nrSteps // x-space between steps

  for (let i = 0; i < nrSteps; i++) {
    this.componentHandler.add(stepComponent, {
      position: new SKYMATH.Vector3D(i * stepRun, 0, (i + 1) * stepRise)
    })
  }
}
See that everything related to the 3D visualization is managed through properties, so only include what can change
individually. Variables that can be derived (e.g. nrSteps) or constants (e.g. MAX_STEP_RISE) should not be
properties to avoid redundancy and ensure a well-defined components.
Doublecheck the solution code here:
- STAIRSTEP:
export interface ComponentProperties {
  width: number
  depth: number
  height: number
}
export class Component extends STUDIO.BaseComponent<ComponentProperties> {
  constructor() {
    super()

    this.properties = {
      width: 200,
      depth: 500,
      height: 20,
    }
  }

  generateGeometry() {
    const { width, depth, height } = this.getProperties()

    const model = new SKYCAD.ParametricModel()
    const baseSketch = SKYCAD.generateRectangleSketch(0, 0, width, depth)
    const plane = new SKYCAD.Plane()
    model.addExtrude(baseSketch, plane, height)

    const geometryGroup = new SKYCAD.GeometryGroup()
    geometryGroup.addGeometry(model, {
      materials: [new SKYCAD.Material({ color: new SKYCAD.RgbColor(196, 164, 132) })],
    })

    return geometryGroup
  }
}
- RAILING:
export interface ComponentProperties {
  height: number
  width: number
  railingHeight: number
}
export class Component extends STUDIO.BaseComponent<ComponentProperties> {
  constructor() {
    super()
    this.properties = {
      height: 3000,
      width: 5000,
      railingHeight: 1200,
    }
  }
  generateGeometry() {
    const { height, width, railingHeight } = this.properties
    const geometryGroup = new SKYCAD.GeometryGroup()
    const model = GEOM3D.generateGlassModel(height, width, railingHeight)
    geometryGroup.addGeometry(model, {
      materials: [
        new SKYCAD.Material({
          color: new SKYCAD.RgbColor(173, 216, 230),
          opacity: 0.5,
        }),
      ],
    })
    return geometryGroup
  }
}
export function generateGlassModel(height: number, width: number, railingHeight: number) {
  const model = new SKYCAD.ParametricModel()

  const sketch = GEOM2D.generateGlassSketch(height, width, railingHeight)
  const plane = new SKYCAD.Plane(0, -1, 0)

  const GLASS_THICKNESS = 20
  model.addExtrude(sketch, plane, GLASS_THICKNESS)

  return model
}
export function generateGlassSketch(height: number, width: number, railingHeight: number) {
  const sketch = new SKYCAD.Sketch()
  sketch.moveTo(0, 0)
  sketch.lineTo(0, railingHeight)
  sketch.lineTo(width, height + railingHeight)
  sketch.lineTo(width, height)
  sketch.lineToId(0)

  const CORNER_RADIUS = 50
  sketch.getNodes().forEach((node, nodeId) => {
    if (nodeId === 1 || nodeId === 2) {
      sketch.addFillet(CORNER_RADIUS, nodeId)
    }
  })

  return sketch
}
- ASSEMBLY:
export interface ComponentProperties {
  width: number
  depth: number
  height: number
  railingHeight: number
}
export class Component extends STUDIO.BaseComponent<ComponentProperties> {
  constructor() {
    super()

    this.properties = {
      width: 5000,
      depth: 500,
      height: 3000,
      railingHeight: 1200,
    }

    this.update()
  }

  update() {
    const { width, depth, height, railingHeight } = this.getProperties()
    this.componentHandler.clearAll()

    const railingComponent = new RAILING.Component()
    railingComponent.setProperties({ height, railingHeight, width })
    this.componentHandler.add(railingComponent)

    // StairSteps
    this.componentHandler.clear(STAIRSTEP.Component)
    const stepComponent = new STAIRSTEP.Component()
    stepComponent.setProperties({ depth })

    const stepWidth = stepComponent.getProperty('width')
    const MAX_STEP_RISE = 220

    const nrSteps = Math.max(Math.floor(height / MAX_STEP_RISE), Math.floor(width / stepWidth))

    const stepRise = height / nrSteps // z-space between steps
    const stepRun = width / nrSteps // x-space between steps

    for (let i = 0; i < nrSteps; i++) {
      this.componentHandler.add(stepComponent, {
        position: new SKYMATH.Vector3D(i * stepRun, 0, (i + 1) * stepRise),
      })
    }
  }

  generateGeometry() {
    return this.componentHandler.generateAllGeometry()
  }
}
Congratulations! You have created your first assembly. Having it in an app with dimensions would look like this:
Do you want to have a copy of this app in your team? Let us know at support@dynamaker.com! Remember that everyone has their own way of developing and there are multiple valid ways to do things as long as anyone can understand the code!
Now that you know how to create assemblies, it's time to autogenerate drawings of this staircase at the click of a button in the next tutorial Drawings.