How To Add Textures
In order to add textures in DynaMaker models, we will go through these points:
1. Prepare Pictures
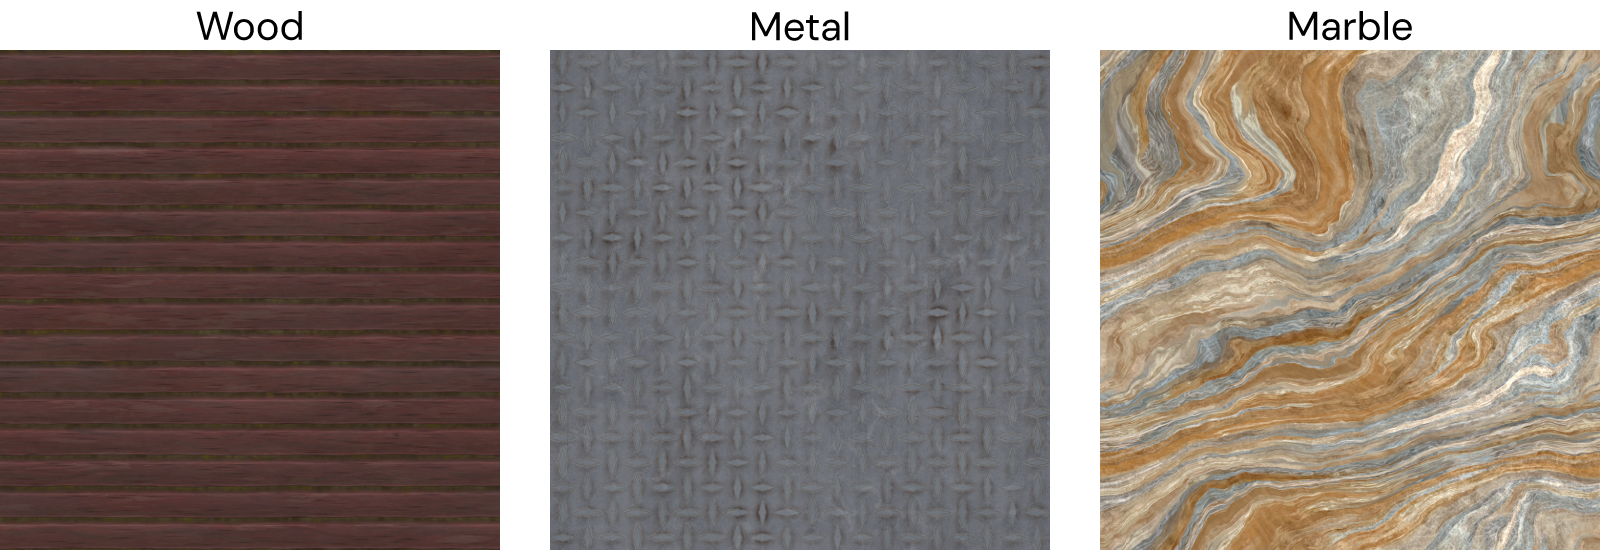
To add textures to a model, we will use the following pictures to create textures of wood, metal and marble. In DynaMaker, textures generate a tiled pattern to ensure the surface is covered completely.
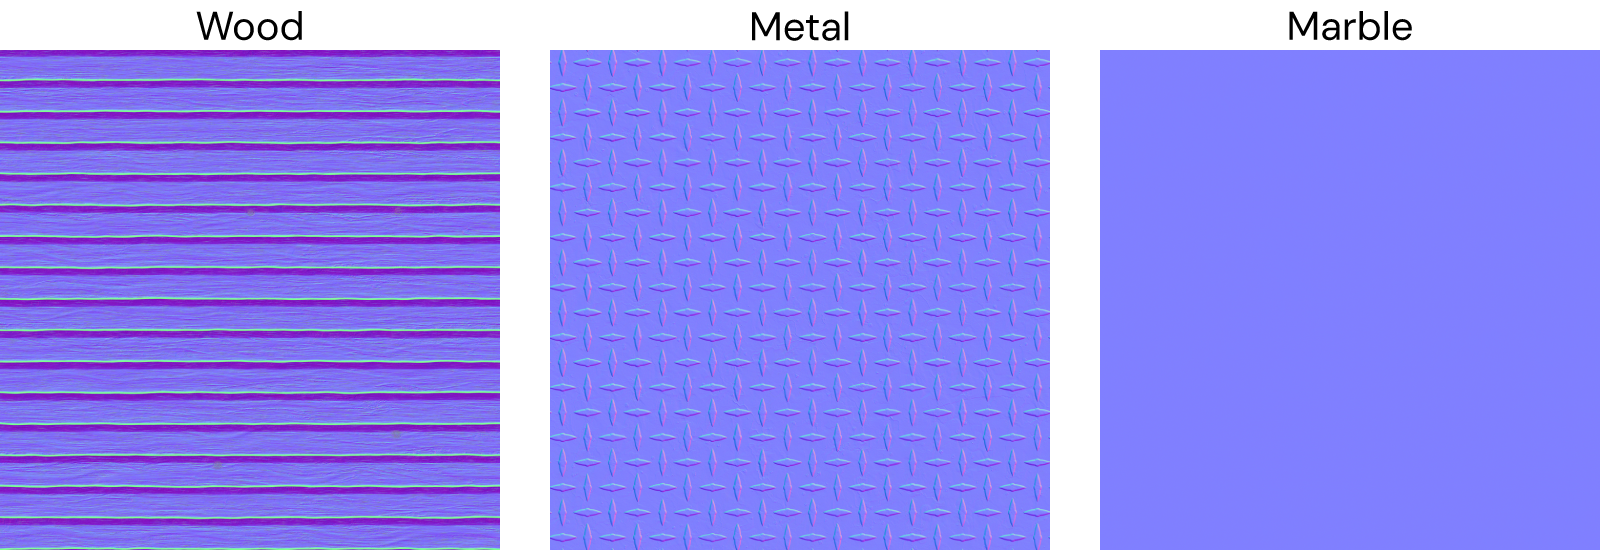
To create a feeling of 3D, you can add a normal map, an image that stores a direction at each pixel, faking high-resolution details on low-resolution models. The normal map pictures for the previous examples are:
You can download these examples here (.zip).
2. Create Textures
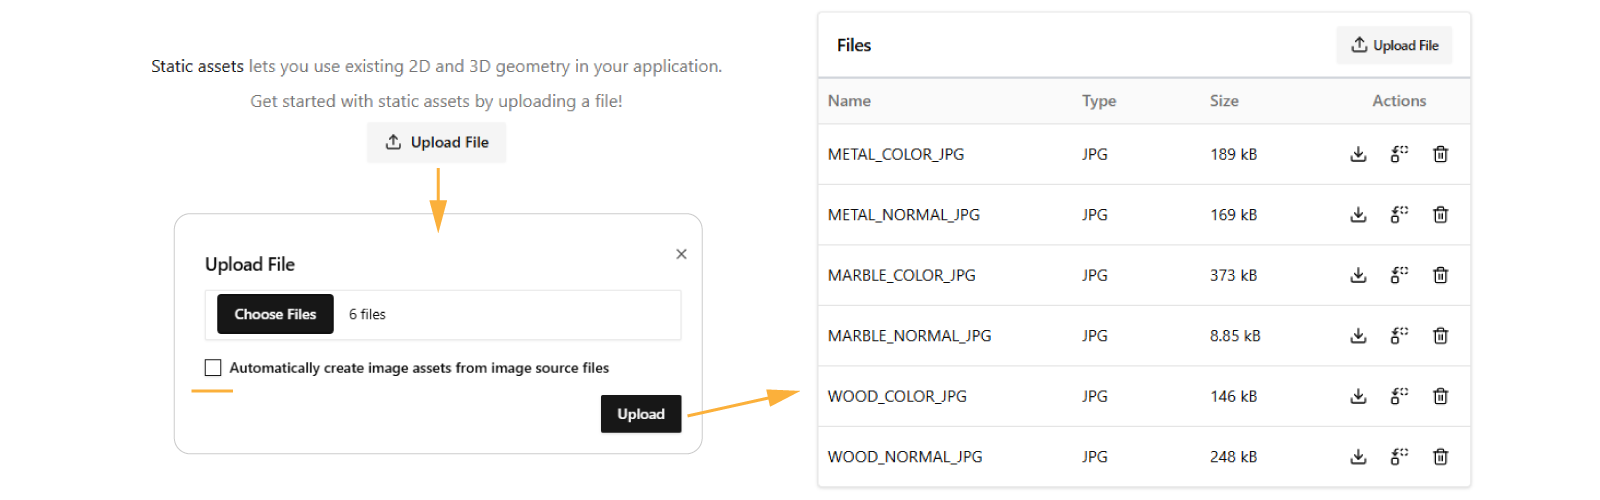
Once we have the pictures, we need to upload them to the project. For this:
- Go to the app dashboard of your app
- Upload all files with proper names (you can skip creating their asset Image):
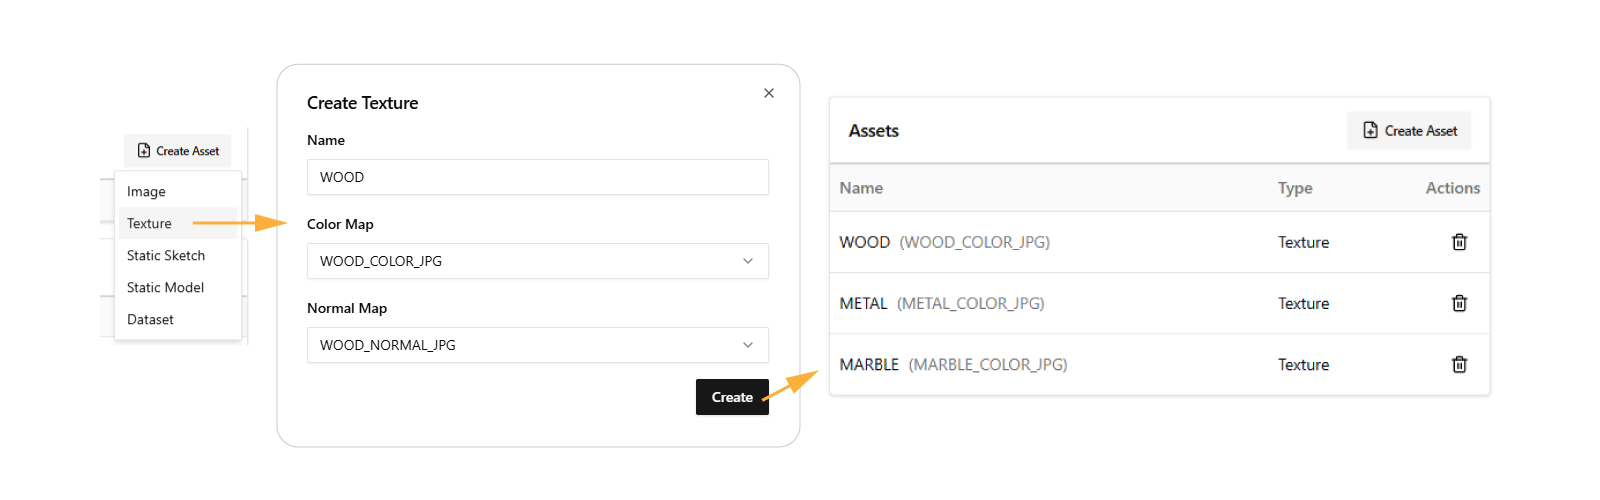
- Under Assets, create a Texture for each material in Create Asset:
3. Apply Textures
Great! Let's add the textures to our model. Textures can be applied to/with:
Entire Model
When you want to apply the same texture to the entire model:
- Go to the component you want to add the texture to
- Make sure ASSETS is imported (it will show up in the list as soon as you have uploaded a file)
- Go to the function where the model is added to the geometry (typically in
generateGeometry()in COMPONENTS) - Add the texture to the material and adjust its scale with
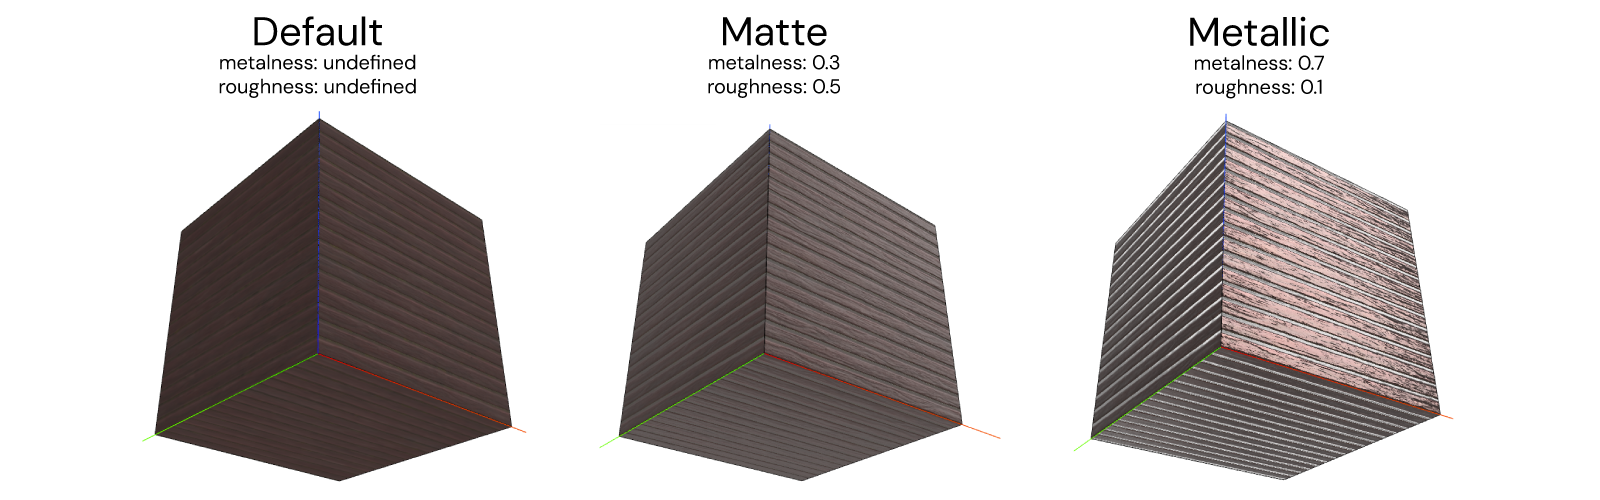
textureHeightand/ortextureWidth: - Tweak
metalnessandroughnessas values from0to1until you get the light reflections as expected:
const materials = [
  new SKYCAD.Material({
    textureId: ASSETS.TEXTURES.WOOD,
    metalness: 0.3,
    roughness: 0.5,
    textureHeight: 100,
  }),
]

geometryGroup.addGeometry(model, { materials })
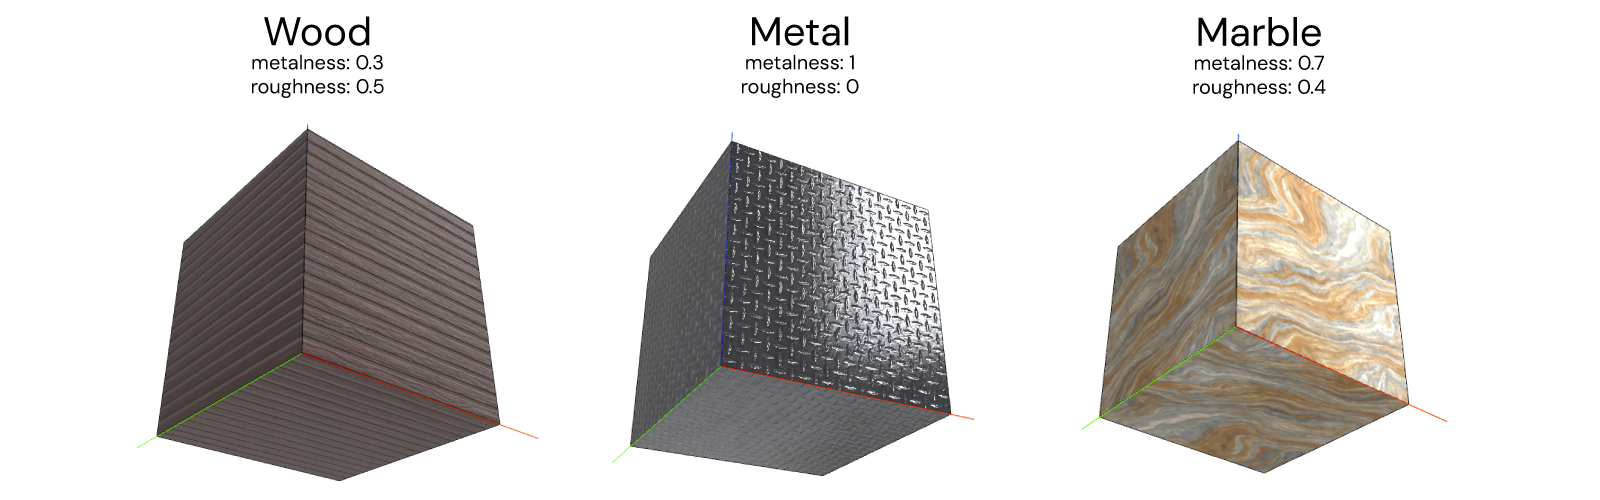
See that each material needs its own setup to give it a realistic feeling:
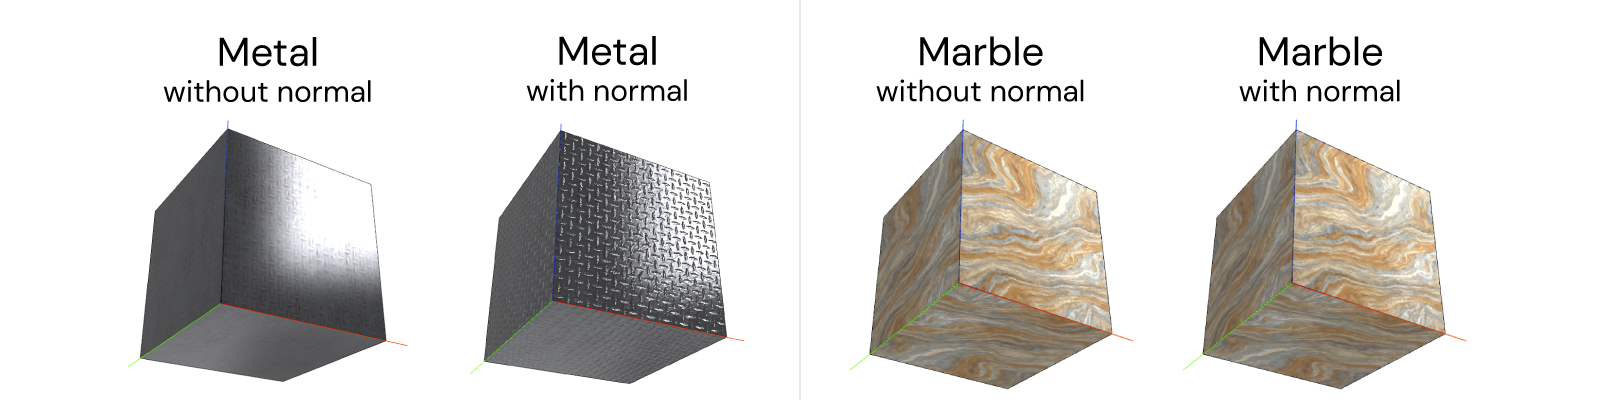
You can also create textures without normals when they don't really contribute to the light reflections (like in the case of the Marble), but you can also see the difference it makes to have a good normal map when relevant (like in the case of the Metal):
Different Sides
When you want to apply a texture to a specific side or face of your model:
- Go back to your component model and its material
- Keep adding more materials to different surfaces, use target arguments:
target: { featureIndex: 1 }to specify what model feature specific surfaces to targettarget: { featureIndex: 1, surfaceGroupIndex: 1 }to specify the feature specific group of surfaces to target
const materials = [
  new SKYCAD.Material({
    textureId: ASSETS.TEXTURES.WOOD,
    metalness: 0.3,
    roughness: 0.5,
    textureHeight: 100,
    target: {
      surfaceGroupIndex: 1, // start surfaces of extrude (base)
    },
  }),
  new SKYCAD.Material({
    textureId: ASSETS.TEXTURES.METAL,
    metalness: 1,
    roughness: 0,
    textureHeight: 75,
    target: {
      surfaceGroupIndex: 3, // side surfaces of extrude
    },
  }),
  new SKYCAD.Material({
    textureId: ASSETS.TEXTURES.MARBLE,
    metalness: 0.7,
    roughness: 0.4,
    textureHeight: 300,
    target: {
      surfaceGroupIndex: 2, // end surfaces of extrude (top)
    },
  }),
]
You can read more about
targetand its arguments here.
Here the cube is extruded at an angle so that the base is visible, rotate the camera to inspect it:
Transparent Textures
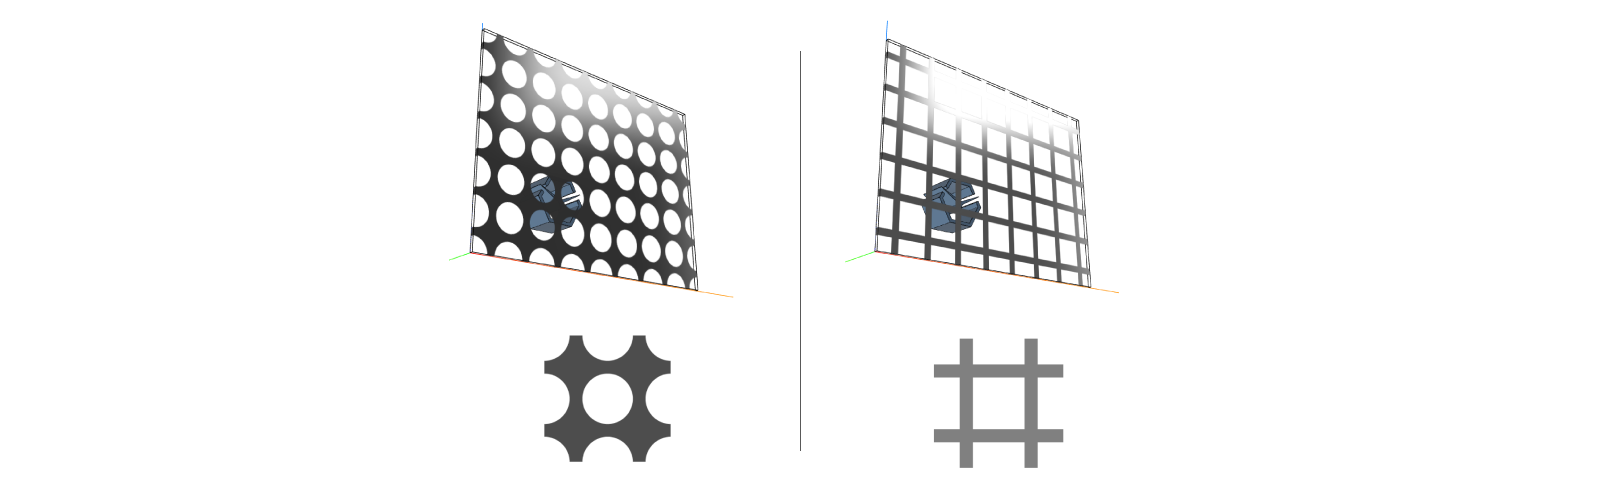
As a way of optimizing your models, having textures with transparent background will help tremendously with the app performance. E.g. each wire or hole of a mesh-grid wall doesn't need to be modelled since it would come with the texture.
When you have pictures (must be in PNG format) that have transparent background like these (download to try them out below):
then you need to use transparent: true in your material to enable the transparent background and make sure the render
reads the transparent background of your PNG pictures correctly, as:
const meshCircleMaterial = new SKYCAD.Material({
  textureId: ASSETS.TEXTURES.MESH_CIRCLE,
  transparent: true,
  metalness: 1,
  roughness: 0.1,
})

const meshSquareMaterial = new SKYCAD.Material({
  textureId: ASSETS.TEXTURES.MESH_SQUARE,
  transparent: true,
  metalness: 1,
  roughness: 0.1,
})
Remember that you can still change the material
color,opacity,metalness&roughnesseven with an applied texture. Also, it's important to keep the size of the picture files as low as possible so that the performance of the app is not affected negatively.