Design Automation Service (DAS)
Certain advanced CAD tasks may not be feasible to implement in the browser with TypeScript. However, you can still accomplish many such tasks within your DynaMaker application by utilizing our Design Automation Service.
To get started with DAS, the first step is to enable its plugin in your application's dashboard. This can be done by following these 3 simple steps:
-
Navigate to the Plugins section within your app dashboard and locate the Design Automation Service plugin.
-
Open the plugin's Settings, enable it, and click on the Save button to save your changes.
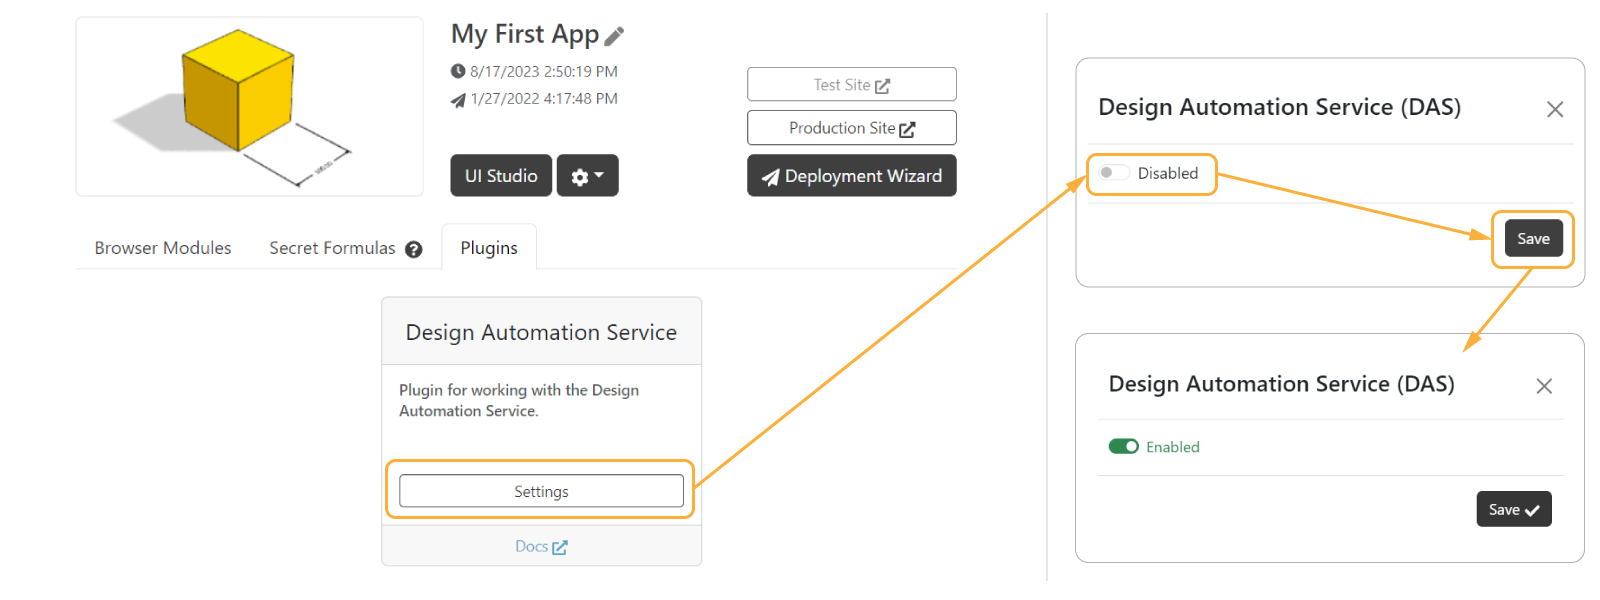
- Once the plugin has been enabled, you can access the
PLUGINS.DASnamespace and begin utilizing its functionality within your application.
Generate STEP File
Depending on what you have in your geometry, you can generate STEP files in one way or another. Here we show a code snippet that demonstrates how to create a button that can be used to generate and download a STEP file in each way from:
-
geometry with 2 or more models that include static models with source STEP files (geometries made from
SKYCAD.ParametricModelcan be included or not), DAS must be used:const downloadSTEPButton = new SKYUI.Button('Download STEP', async () => {
const assemblyComponent = ACTIONS.getAssemblyComponent()
const geometry = assemblyComponent.generateGeometry()
const stepData = await PLUGINS.DAS.generateSTEPFile(geometry)
Studio.downloadFile('assembly.step', stepData)
})Notice that there must be always 2 models present and one of them must be a static model to be able to use DAS.
-
geometry with 1 static model with no geometries made of
SKYCAD.ParametricModel, you can retrieve it directly from Files.const downloadSTEPButton = new SKYUI.Button('Download Door handle STEP', async () => {
const doorHandleStepData = await fetchFileText(ASSETS.URLS.DOOR_HANDLE_STEP)
Studio.downloadFile('model.step', doorHandleStepData)
})
async function fetchFileText(url: string) {
const response = await fetch(url)
return response.text()
}Notice that the original STEP file will be used, meaning that it will keep its origin and the new possible position/rotation given to the static model will be lost.
-
geometry with no static models but 1 or more geometries made exclusively of
SKYCAD.ParametricModel, you can use the regular STEP exporter instead for that.
Reuse original STEP files
If you have the original STEP models and you want to use them in the export process through the DynaMaker plugin DAS, then you can add the STEP model as a source of said mesh model as follows:
const meshModel = new SKYCAD.MeshModel(ASSETS.URLS.MY_MODEL_GLB, { sourceUrl: ASSETS.URLS.MY_MODEL_STEP })
Doing so, the mesh model will be completely replaced by the original STEP model accounting for the instance position and rotation.